“What lies behind us and what lies before us are tiny matters compared to what lies within us.”
-Ralph Waldo Emerson
I love the holiday season because everything is familiar. In a world where life becomes more mercurial with each setting sun, and where a bustling city can fall apart in a day, familiarity is a precious treasure. I thrive on sameness, and during this time in my life when I sit on the brink of the most enormous of changes, the holidays could not be more welcome.
When I want to evoke some holiday nostalgia I turn to the oven. A long day of baking serenaded by an erratic Christmas playlist always brings some coziness to the house.
We need to arm ourselves with some tools. We need tools for feeding people because, if your holidays are anything like mine, they are characterized by company. Company is wonderful, but mealtime can seem overwhelming, especially, when you have focused all your attention towards diagramming your grandiose plans for that one great meal.
Though the brine for the turkey and the homemade rolls are salient, breakfasts for your hungry guests cannot be ignored. This is when we break out our tools and pull off a specular breakfast that will stand up to the fabulous turkey you have been meticulously preparing.
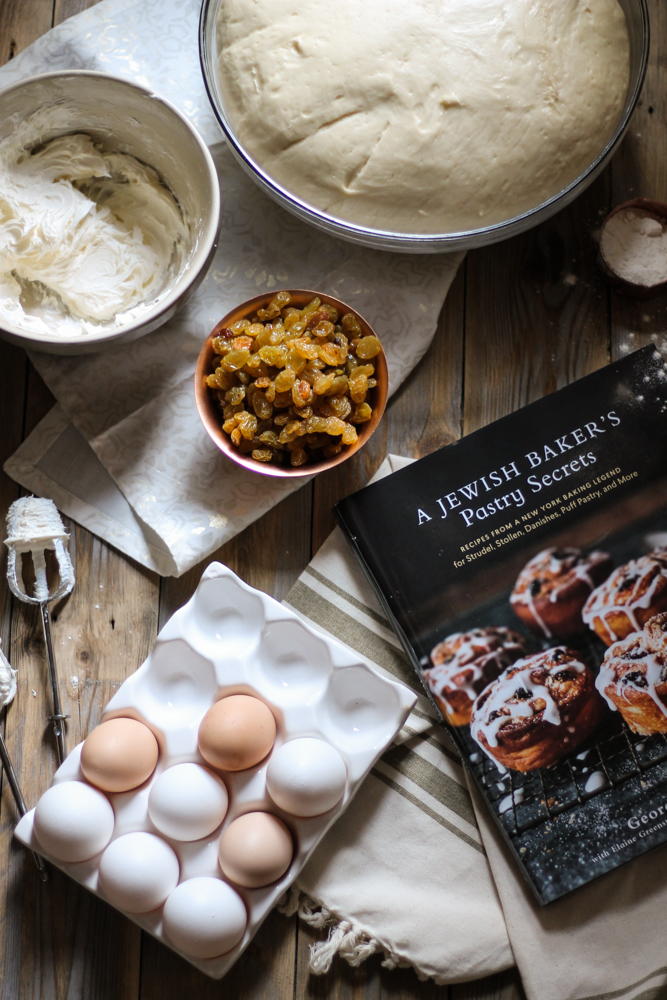
Several weeks ago I received this lovely book, A Jewish Baker's Pastry Secrets, and it took me a long while to decide which recipe I would attempt first. This collection of family-created and well-loved recipes is beautifully written. Though some of them are quite daunting, even to someone who makes her own puff pastry, the book utilizes classic recipes and adapts them to create many a loved family treat.
After much deliberation, I settled on what was really the only reasonable option - Cheese Buns. I remember eating these pastries as a child, though the ones of my childhood were far inferior to these soft, pillowy buns.
The basic bundt dough recipe is enhanced with several handfuls of golden raisins, and filled with a soft, lightly sweetened, cream cheese filling and sprinkled with cinnamon sugar. The cinnamon sugar and raisins were my idea. After the initial testing of the recipe, I decided to amp up the flavor a bit. These adaptations were not necessary, but I fancied them, and, as we all know, I cannot leave things well enough alone.
Now before you huff off with rolled eyes because this recipe in no way sounds like something you can simply whip up in the morning, let me tell you the best part. The very best, most wonderful part of this recipe is that the dough can be made well in advance and frozen. After the dough is defrosted you are just a few steps away from hot, homemade rolls. Just in time for a late breakfast for your sleepy house guests. They will greatly appreciate the fresh pastries and you will be glorying in the fact that you whipped them up almost as easily as opening a can of biscuits.
P.S. Please do not ever buy canned biscuits. Please.
Oh, and the other wonderful thing that I absolutely love about this dough? It is so versatile. One batch makes a huge amount of dough - enough for two separate breakfasts recipes. Make the whole batch and divide it to pull out of the freezer whenever company calls. I’ll be sharing my own recipe with this dough next week!
I think we should all make a big batch of bundt dough this weekend and bake ourselves some warm, creamy, cheese buns for Saturday morning pleasure, and freeze the rest for next week’s recipe. Yes, do that.
On a side note, your rolls probably shouldn't overflow with cream cheese filling like mine did. But then again, cream cheese frosting is one of the most glorious substances on this earth, so why not put a little extra in there? In fact, you could double the recipe and really spread the love. That's a bit extravagant though. I definitely did not do that. Nope. I did not.
Okay, I did... No regrets.
There is something so satisfying about pulling a warm sheet of hot rolls out of the oven. I need to find a candle that smells like that moment.
This is the moment where Paul Hollywood tells me that my rolls were too close together and that the edges are rubbish and then I unapologetically shove a bun into his mouth. I happen to find great joy in tearing the rolls apart and I have never turned up my nose to a shabby edge.
If you don't watch The Great British Bake Off, I apologize for that tangent. But seriously, you should stop whatever you are doing right now and have a little marathon. Netflix it.
This is the very essence of beginning well.
Sincerely,
Pedantic Foodie
I received this book from Blogging for Books for this review. As always, all opinions are completely my own.
Cheese Buns with Golden Raisins & Cinnamon Sugar
makes up to 18 buns (see note) / recipe adapted from A Jewish Baker’s Pastry Secrets
for the cream cheese filling
- 4 ounces cream cheese, softened
- 2 tablespoons unsalted butter, softened
- 1 egg yolk
- 1/2 cup + 2 tablespoons granulated sugar
- 1/2 teaspoon vanilla extract
In a medium bowl combine cream cheese and butter and use an electric mixture to beat until smooth. Add egg yolk and sugar and beat on medium speed, until fluffy. Mix in vanilla extract.
Transfer the filling to a piping bag and refrigerate until ready to use. Allow to soften for 10-15 minutes before piping.
Note: When doubling the cream cheese filling, do not double the amount of egg.
for the bundt dough*
- 1/2 cup warm water (about 95 degrees F)
- 3 packages active dry yeast (3 scant tablespoons)
- 1 cup whole milk, at room temperature
- 3/4 cup granulated sugar
- 3/4 unsalted butter, cut into cubes
- 3 large eggs
- 6 cups bread flour
- 1/4 cup nonfat dry milk
- 2 1/4 teaspoons salt
- 2 teaspoons vanilla extract
- 2/3 cup golden raisins
*This dough recipe will make 18 buns if you use the entire batch of dough, or 9 buns when divided. If you wish to make the full recipe, rather than freezing a portion of the dough, double the recipe for the cream cheese frosting.
In the bowl of your stand mixer combine all ingredients and mix on low speed, using the paddle attachment, until just combined. Then, change to a dough hook and knead the dough for 8-10 minutes, until smooth, shiny, and elastic. The dough will look rather loose, but resist the urge to add more flour.
Coat a large bowl with butter and place the dough in the bowl, turning to coat. Cover with plastic wrap and allow to rise until doubled in volume, about one hour.
When the dough has doubled, turn it out unto a floured surface, punching down the dough to release some of the air.
This is where you have to make your decision.
If dividing and freezing, cut the dough into two equal pieces and fold one portion into a rectangle by folding the ends in towards the center. Allow to rest for 15 minutes before wrapping tightly in plastic wrap. The dough can be frozen for up to one week.
Shape the second portion of the dough, into a 12x8 rectangle and press the golden raisins into the surface of the dough. Allow to rest for 15 minutes.
If you are using the entire batch of dough, you should form two rectangles and double the amount of raisins.
Roll the rectangle(s) up, lengthwise, tucking the end under itself tightly as you roll and squeezing gently to extend the roll. You should be left with an 18 inch log. Cut the log(s) into 9 or 18 equal portions, rolling each portion to form a tight bun.
Place the buns on sheet pan(s) lined with parchment and allow to rise for 45 minutes, until almost doubled in volume.
Using a small glass, press into the center of each bun to form an indentation. You may need to dust the bottom of the glass with a bit of flour so that it does not stick. You should be left with a fairly deep well and a well-rounded rim.
assembly
- cinnamon sugar (1/4 cup sugar mixed with 2 teaspoons ground cinnamon)
- egg wash (1 egg + 1 teaspoon water)
- cream cheese filling
Brush the edges of each bun with egg wash and then fill each well with prepared cream cheese filling. Allow the buns to sit, uncovered, for 20 minutes, until the rims are dry and have risen slightly.
Preheat the oven to 350 degrees F.
When the buns have finished rising, brush with another coat of egg wash and sprinkle the edges with cinnamon sugar.
Place the buns in the center rack of the oven* and bake for 25-30 minutes, until deep golden brown. The rims should feel firm to the touch. Cool for 10-15 minutes before serving or wrap in plastic wrap and store for up to 2 days. Enjoy!
*If baking the full batch of buns, you will have to bake in two batches - 9 buns per sheet pan.


