Lemon Meringue S'mores // Summer of S'mores Pt. 1

I like series.  You may have noticed.  Series are one of my favorite things because they stimulate both constancy and anticipation, both of which make my brain very happy. 

Lemon Meringue S'mores {Pedantic Foodie}

Last Summer, I did a series on this blog called "Thirsty Friday" where I blended, and juiced, and used enough paper straws to last a lifetime, and it is still one of my favorite things I have done on this site.  

Since we are now officially, in the depths of Summer, I felt that it was time for a new series. 

While I considered doing drinks again, I knew that nothing could possibly top this Watermelon & Raspberry Lemon Slushieand I would really prefer to just drink glass after glass of that glorious pink slushie rather than trying to invent something better.

Lemon Meringue S'mores {Pedantic Foodie}

I knew that this Summer needed something beyond drinks, it needed something gooey, toasted, and chocolate-filled.  In the end, the choice was obvious - my very favorite and simplest Summer dessert.  

Lemon Meringue S'mores {Pedantic Foodie}

While I can easily pass up their cookies, I have to give the girl scouts my undying gratitude for the creation of the s'more.  It is a true masterpiece, and the perfect balance of textures, flavors, and sweetness. 

Lemon Meringue S'mores {Pedantic Foodie}

While the classic trio is the height of perfection, last week, in my little kitchen, I met with a twist on perfection that nearly outdid its inspiration. 

Lemon Meringue S'mores {Pedantic Foodie}

Before an angry mob forms, all the fundamental elements of s'mores are present.

Lemon Meringue S'mores {Pedantic Foodie}

Graham Crackers - No improvisation needed.

Chocolate - White.  I know, technically, it's not chocolate, but most of the reasonable world believes it is so let's call it chocolate.  Buy the good stuff though, you will thank yourself. 

Marshmallows - Homemade and lemon; be fancy. 

Bonus ingredient for and extra dose of heavenly flavor magic - Lemon curd.  You get bonus points if you make it yourself.

Lemon Meringue S'mores {Pedantic Foodie}

I like to do this operation in two sections.  Section one being the graham cracker, lemon curd, and marshmallow, and section two comprising of the second half of graham cracker and the white chocolate. 

Lemon Meringue S'mores {Pedantic Foodie}

The best part about homemade marshmallows might just be cutting them to perfectly fit your graham crackers.  Oh symmetrical bliss... 

Lemon Meringue S'mores {Pedantic Foodie}

I toasted the top of my marshmallows with my kitchen torch and then went over the white chocolate ever-so-lightly to get it just a little melty.  

Lemon Meringue S'mores {Pedantic Foodie}

Toasted, smashed and ready to eat.

I should probably mention that this is probably the messiest s'more you will ever bite into, but it is worth every bit of stickiness. 

Lemon Meringue S'mores {Pedantic Foodie}

This might just be the best s'more yet...and the Summer is just beginning.  

Sincerely, 

Pedantic Foodie

Be sure to check back each week this Summer for a new, creative twist on one of my favorite classics!  


Lemon Meringue S’mores

makes one (can easily be multiplied)

- 1 full graham cracker, broken in half

- 2 teaspoons lemon curd (you can estimate this)

- 1-2 lemon marshmallows (depending on how large or small you cut them)

- several squares good quality white chocolate

Spread the lemon curd in an even layer over one of your graham cracker halves.  Place the marshmallow on top and use a kitchen torch to toast the top of the marshmallow.

Place the chocolate squares on the second half of the graham cracker and lightly run the flame of the torch over the chocolate, just until it begins to melt.  Be sure to hold the flame high enough above the chocolate so it does not scorch. 

Place the chocolate half atop the toasted marshmallow and take the biggest bite you can!  Enjoy!

Cook’s note:  You can certainly go the traditional route and toast your marshmallows over a campfire, however, I have just found that homemade marshmallows tend to melt quicker and more easily over an open flame.  If you are making these for a group, try placing the graham cracker halves on a lined sheet pan with the marshmallows and chocolate facing up.  Place the open s’mores in your oven (set to the broiler setting) and broil for 2-3 minutes, or until the marshmallows are toasted and the chocolate is just barely melted.  


You may also like...

Cherry Pie Pops

For the first time in forever, I am thoroughly loving Summer.  I am taking deep, appreciative breaths of the warm air, waking with a vigor and excitement that lasts through the ups and downs of the day, trying to avoid sunburns, and even daydreaming about dipping my toes into blue water on occasion.

Cherry Pie Pops {Pedantic Foodie}

I am mystified by this unfamiliar enthusiasm for warm weather, but rather than questioning it, I am drinking as much iced coffee and coconut cream as one lady can hold and trying to balance responsibility with spontaneity.  That is very much a work in progress, but I am trying.

Cherry Pie Pops {Pedantic Foodie}

I carry around a big purse full of tiny notebooks that hold the endless ideas I’ve jotted down in moments of insane hunger (read: during church), but often those scribblings never evolve past their pen and ink state.  I make my way to the market with every intention to make whatever my mind dreamed up over the weekend.  I pick out my weekly bouquet of flowers, and then, in one swift change of mind, an entirely new idea captures my fickle mind and my grocery list is cast away with reckless abandonment. 

Cherry Pie Pops {Pedantic Foodie}

Since this has become quite a pattern with me, I have often forgone the practice of list-making altogether, since they often become nothing but crumbled confetti in the depths of my purse.  Last week, on one such list-less trip, I walked past these jars of shiny, candy-apple-red pie filling.  Then, I took several steps back to examine. 

Cherry Pie Pops {Pedantic Foodie}

I love Trader Joe’s.  I do not need to be paid or sponsored or coerced in anyway to write that.  I absolutely love that store.  So, while I would never, ever, EVER buy pre-made pie filling, and while I have given my dear mother many a condescending stare upon seeing the cans on her shelves (my father adores it), I knew that this filling, was likely something special.  Seemingly everything my good friend, Joe (you know, Trader Joe) puts his label on promises to please.

Cherry Pie Pops {Pedantic Foodie}

My faith was by no means unfounded, because this pie filling is truly excellent.  Unlike the sickening sweet, bitter, and overabundant with gluey cornstarch, pie fillings of my youth, this filling is lightly sweetened, perfectly acidic and is full of natural cherry flavor. 

Of course, I was not going to make a pie with pie filling, that would be atrociously predictable.  I had something else in mind.

In fact, I have had that same something in mind ever since I bought this popsicle mold.  Two popsicle recipes in a row might be too much, but then again, it might be just what we need. 

Cherry Pie Pops {Pedantic Foodie}

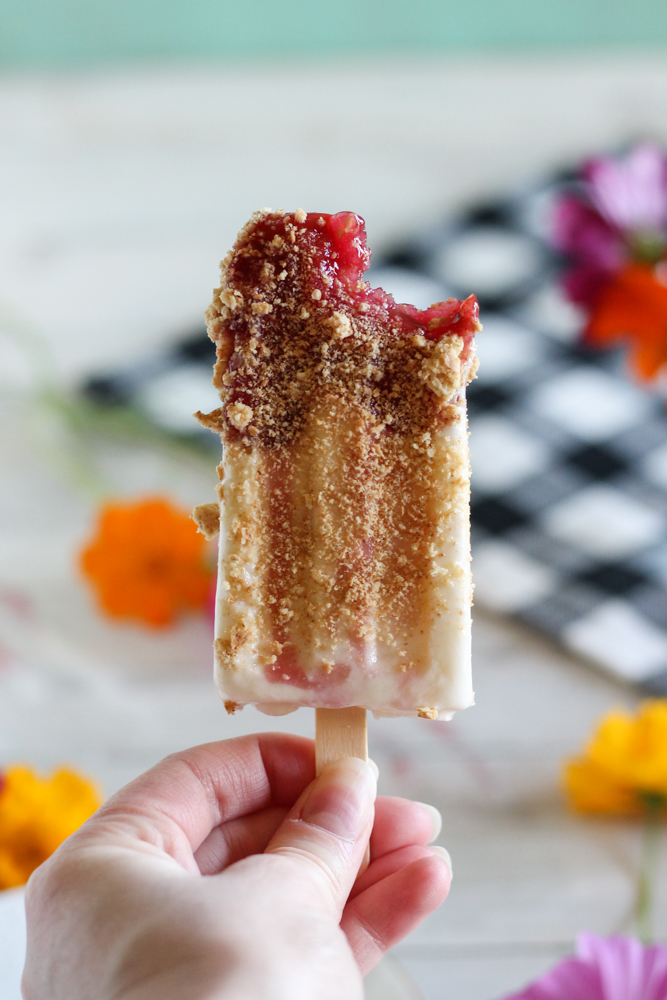
Especially because these are extra pretty, Fourth of July-esc popsicles.  It is true, there is no sign of blue in these treats, but if you paint your finger nails blue you can get the full Instagram-worthy experience. I can’t do everything for you. 

Cherry Pie Pops {Pedantic Foodie}

When I saw that filling, I knew I wanted to create a popsicle that would taste like classic cherry  pie (Daddy's favorite) served with vanilla ice cream.  This is that popsicle.

Cherry Pie Pops {Pedantic Foodie}

Its retro essence is blended with just enough modern to make it perfect.  That's math right there.

Cherry Pie Pops {Pedantic Foodie}

The buttermilk provides a welcome tang that balances the sweetness of the fruit, making it just sweet enough to still be refreshing.  The block of cream cheese does not hurt one bit either. 

Cherry Pie Pops {Pedantic Foodie}

The creamy base of this popsicle is flavored with vanilla and just a teeny bit of almond extract to really play up that cherry flavor.  

Cherry Pie Pops {Pedantic Foodie}

After you place the cherries and buttermilk base in your popsicle molds, you will have a decision to make.  You may either leave the two components layered, or use a chopstick or butter-knife to swirl the parts together.  I left my first batch layered, as you can see.  It was delicious and beautiful, but there was something to be said about the swirled versions that allowed you to have the flavors of cherries and buttermilk in each bite.  The choice is yours. 

Rolling these popsicles in graham cracker crumbs imitates the crust of the pie.  I let the popsicles sit at room temperature just for a minute or two to soften, and then rolled them so that the crumbs would stick.  You could return them to the freezer at this point, but I would opt for rolling each one as you are serving it.  Of course, you could forgo this step all together, but I always have room for more crunchy texture in my life. 

Cherry Pie Pops {Pedantic Foodie}

Cherry pie.  On a stick.  Clearly, we know how to Summer. 

Sincerely, 

Pedantic Foodie

This post was not sponsored by or done in collaboration with Trader Joe's, I just happen to like that store, a lot!  The opinions stated here are entirely my own, as always. 


Cherry Pie Popsicles

makes twelve popsicles

- 1 cup whole milk

- 2/3 cup granulated sugar 

- 1 cup buttermilk 

- 8 ounces cream cheese, softened 

- 1 1/2 teaspoons vanilla extract 

- 1/4 teaspoon almond extract 

- 1 1/2 cups of your favorite cherry pie filling (I like Trader Joe's) 

- 1 cup graham cracker crumbs (about 9 crackers pulsed in a food processor)

In a small saucepan, combine whole milk and sugar.  Place over medium heat and cook, stirring often, until the sugar has completely dissolved.  Allow to cool for 5-10 minutes, until warm, but not hot. 

Pour the milk mixture into the pitcher of your blender, along with the buttermilk, and cream cheese.  Blend until smooth.  Transfer the mixture to a bowl with a spout and stir in the extracts. 

Place 2 tablespoons of your cherry pie filling in each popsicle mold.  Cover with the buttermilk base and use a chopstick or butter-knife to swirl, if desired.

Cook’s Note:  Leaving the components layered creates a beautiful popsicle, but there is also something to be said about the swirled version that allows you to have the flavors of cherries and buttermilk in each bite.  The choice is yours. 

Place in the freezer for 1 1/2-2 hours (depending on your freezer)* and then insert your wooden popsicle sticks.  Freeze for an additional 2-3 hours, until the popsicles are frozen. 

Place the molds in warm water for 1-2 minutes to loosen, and then remove.  Wrap the popsicles in parchment and place them in zip-top bags until ready to eat.

Before serving, allow the popsicles to soften slightly, then roll in the graham cracker crumbs.  Serve immediately.  Enjoy! 

*The popsicles should be about half-way frozen when you insert the sticks.  This will keep the sticks in the center of the popsicle, and will prevent them from moving around. 


Roasted Banana & Butterscotch Pudding Pops

I'm really not very good at keeping up with the internet food celebrations.  National food days always pass me by and then I regret not making and consuming piles of waffles, or cookies, or whatever the rest of the world is eating.

Roasted Banana & Butterscotch Pudding Pops {Pedantic Foodie}

There are a couple of reasons behind my lack of motivation for these pseudo holidays.  First, I always forget about them until the day before, and then I stare at my computer screen and whisper to myself, "Uhh, missed another one," and secondly, because even if I did get organized enough to keep up with them, my cravings do not often comply with what the rest of the world happens to be eating.  

Roasted Banana & Butterscotch Pudding Pops {Pedantic Foodie}

However, this week was different, and that is because this week is Popsicles Week and I am almost always in the mood for a popsicle -- especially if it happens to be unearthly creamy.  

My Instagram feed has been overflowing with the prettiest frozen treats imaginable and I want to lick my phone so badly.  But ew, I heard that cellphones are reallyyyyy dirty, so I have tried to show some restraint. 

Roasted Banana & Butterscotch Pudding Pops {Pedantic Foodie}

If you have not already invested in a popsicle mold for this Summer, you should.  I had one on my Amazon list forever before I finally ordered this one and I am so happy that I did.  Your eyes may be assaulted with an influx of popsicles before this Summer comes to an end, but I just have SO many ideas!  

Roasted Banana & Butterscotch Pudding Pops {Pedantic Foodie}

I should tell you right now that these popsicles taste like banana and butterscotch, but the overarching flavor is pure and simple brown sugar.  The dark, molasses-y sugar blankets the soft and familiar flavors of the roasted bananas and the slightly salty butterscotch. 

Roasted Banana & Butterscotch Pudding Pops {Pedantic Foodie}

I roasted my bananas with butter and brown sugar.  If your bananas are not quite as ripe as you would like, this is a wonderful way to deepen that banana flavor. 

Roasted Banana & Butterscotch Pudding Pops {Pedantic Foodie}

The inspiration behind these pops goes entirely to Deb at Smitten Kitchen.  I came across her recipe for these Butterscotch Pudding Popsicles and I knew that I needed them in my life.  

Roasted Banana & Butterscotch Pudding Pops {Pedantic Foodie}

I made her butterscotch base, and then added roasted bananas that I had pureed with a bit of coconut cream.  

I know, I know -- most of you are tired of this coconut cream fest, but I cannot bring myself to stop putting it in anything and everything. 

Roasted Banana & Butterscotch Pudding Pops {Pedantic Foodie}

Because this base is so rich and thick, you do not have to wait to put the sticks into the popsicle molds.  I really like that because I am notoriously bad at remembering to come back and slide them in after two hours. 

Roasted Banana & Butterscotch Pudding Pops {Pedantic Foodie}

The waiting is hard, but the rewards are unbeatable. 

My favorite part of popsicles are those long, rectangular indentations.  I do not know why, but they bring a whole lot of happiness to my heart. 

Roasted Banana & Butterscotch Pudding Pops {Pedantic Foodie}

Are you a biter or a licker?  

I always begin very patiently and ladylike and then end up biting through the frozen bar of creaminess and hurting my teeth.  It's so worth it though. 

Roasted Banana & Butterscotch Pudding Pops {Pedantic Foodie}

I know that these popsicles would not exactly win any beauty pageants.  They certainly have nothing on these rainbow pops in looks, but what they lack in allure, they make up in flavor. 

Roasted Banana & Butterscotch Pudding Pops {Pedantic Foodie}

It is hot outside.  We need refreshment on a stick. 

Sincerely, 

Pedantic Foodie


Roasted Banana & Butterscotch Popsicles 

makes 10 popsicles / adapted from Smitten Kitchen

for the roasted bananas

- 3 medium ripe bananas 

- 2 tablespoons unsalted butter, cut into cubes 

- 1 1/2 tablespoons light brown sugar 

- 1/2 cup coconut cream 

Preheat oven to 425 degrees.

Peel bananas and slice lengthwise.  Lay the bananas cut-side up in a glass baking pan and sprinkle with butter cubes and brown sugar. 

Roast for 15 minutes.  The sugar will have caramelized and the bananas deepened in color. 

Place the bananas, along with any syrup from the pan, in the work bowl of your food processor, along with the coconut cream.  Pulse until smooth.  Set aside while you prepare the butterscotch base. 

for the butterscotch base

- 3/4 cup heavy whipping cream 

- 3/4 cup light brown sugar 

- 2 tablespoons unsalted butter, room temperature 

- 1 tablespoon cornstarch 

- 1 1/2 cups whole milk 

- 1 teaspoon vanilla extract 

- heaping 1/4 teaspoon sea salt 

In a medium saucepan, combine heavy cream, brown sugar, and unsalted butter.  Place over medium-high heat and bring to a boil, then reduce the heat and allow the mixture to simmer for 10 minutes; stir the mixture frequently.  The mixture will become deeper in color and will thicken slightly. 

Whisk in cornstarch and milk and raise the heat to medium.  Cook, stirring frequently, for 5-10 minutes, or until the mixture has thickened to a pudding-like consistency.  Remove from heat and add salt and vanilla.

*Cook’s note: Be sure to taste the mixture at this point so that you can adjust the salt if preferred.  I like mine a bit on the saltier side, so I like to add a little extra.  Just do what tastes right to you! 

Whisk in the banana puree and allow the mixture to cool slightly before distributing amongst the popsicle molds.  Insert wooden popsicle sticks and freeze for 4-6 hours, until solid.

To remove, soak the molds in warm water for several minutes.  Enjoy!

*Cook’s note: I like to wrap my popsicles individually in parchment paper and zip-top freezer bags for longer storage.