Cinnamon Sugar Nutella Puffs

When I was in Portland, I visited the sensational bakery - BakeShop - and had something that nearly brought tears of joy to my eyes.  It was called a Nutella Puff, and it was perfection.  In my fantasy world, I eat one (read: three) for breakfast every morning.  

Cinnamon Sugar Nutella Puffs {Pedantic Foodie}

After taking that final, rapturous bite, I knew that through some form of kitchen magic, I would have to recreate what was truly one of the best pastries my lips had ever met. 

Cinnamon Sugar Nutella Puffs {Pedantic Foodie}

My fiance claims that he cannot strictly articulate the precise moment when he first realized he loved me, but I firmly believe that it was the first time he tasted one of my cinnamon rolls.

The man loves cinnamon rolls, and I love baking for such a handsome and grateful patron, but the frequency of his requests often exceeds even my enthusiasm.  

That is when I have to change things up a bit, in order to feed my restless creativity and his insatiable sweet tooth. 

Cinnamon Sugar Nutella Puffs {Pedantic Foodie}

With those Oregonian Nutella puffs on my mind, and an unrelenting man at my side, our cravings materialized.  

Cinnamon Sugar Nutella Puffs {Pedantic Foodie}

Sweet, chewy dough, lightly spiced, generously buttered, studded with nuts, cut and twisted, and filled with a lavish spoonful of that ever-beguiling substance known as Nutella. 

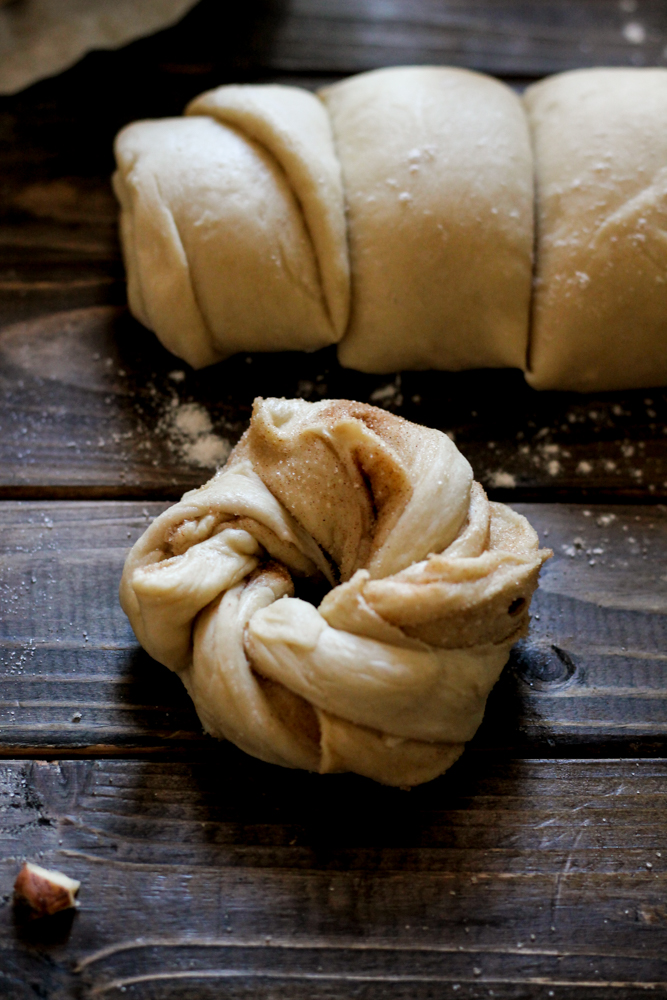
These rolls-turned-chocolate-nests are nestled into a buttered muffin tin and brushed with melted butter. 

Cinnamon Sugar Nutella Puffs {Pedantic Foodie}

Then they get a facelift, by way of a warm oven.  This final proofing period will make them extra airy.   

Cinnamon Sugar Nutella Puffs {Pedantic Foodie}

After proofing, the puffs bake for a rapid twelve minutes, giving you just enough time to make a piping pot of strong coffee. 

Cinnamon Sugar Nutella Puffs {Pedantic Foodie}

After the puffs have baked to golden brown, they are brushed with - you guessed it, another coat of melted butter. 

Cinnamon Sugar Nutella Puffs {Pedantic Foodie}

These puffs are not overly sweet.  They are airy and light, soft and buttery - the perfect breakfast.  

Cinnamon Sugar Nutella Puffs {Pedantic Foodie}

It's almost as good as being back in Portland again. 

Cinnamon Sugar Nutella Puffs {Pedantic Foodie}

I think everything should have Nutella-filled centers.

Sincerely, 

Pedantic Foodie


Cinnamon Sugar Nutella Puffs

makes 9 puffs / dough recipe adapted slightly from Alton Brown  

for the dough

- 8 ounces warm milk 

- 1/3 cup granulated sugar 

- 1 tablespoon + 1 teaspoon active dry yeast 

- 15 ounces all-purpose flour (plus extra for dusting)

- 2 egg yolks

- 1 teaspoon kosher salt

- 2 ounces unsalted butter (room temperature)
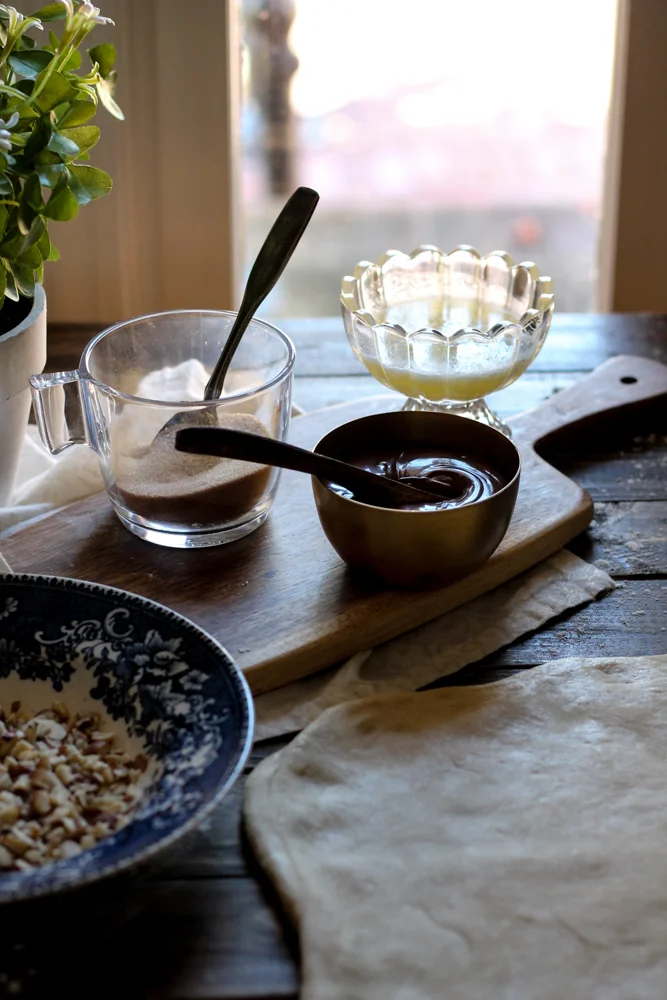
for the filling

- 8 tablespoons unsalted butter, melted (divided use)

- 1/4 cup granulated sugar

- 1/2 teaspoon ground cinnamon 

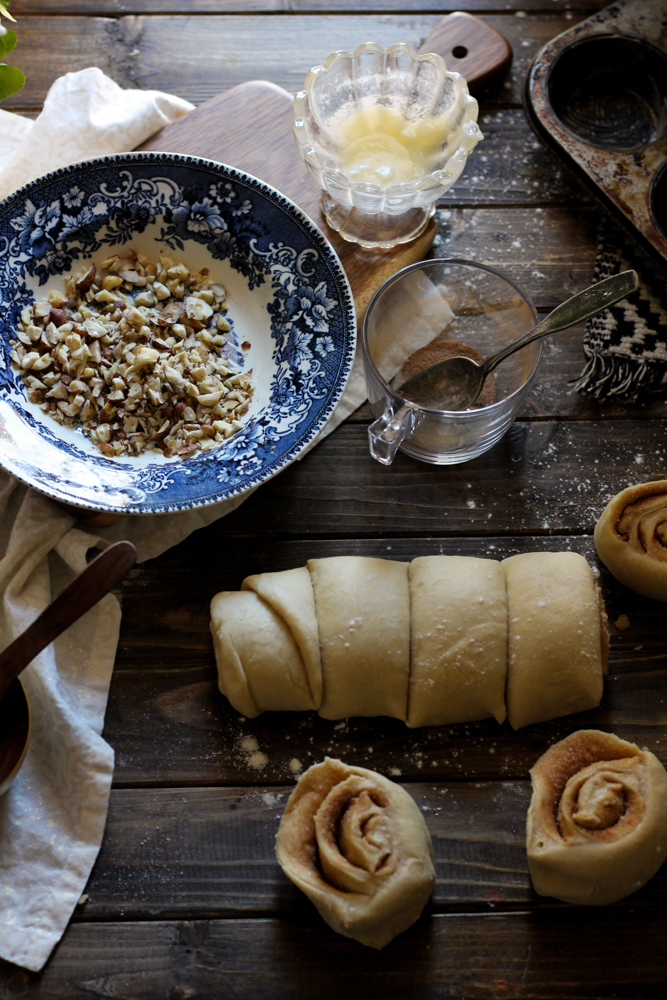
 - 1/4 cup finely chopped hazelnuts (divided use) 

- 9 tablespoons Nutella

- confectioner’s sugar, optional

In the bowl of your stand mixer combine milk, sugar, yeast, egg yolks, flour, and salt.  Use the paddle attachment and combine on low speed for 1 minute.  Allow the dough to rest for 15 minutes. 

Fit your stand mixer with the dough hook attachment and add butter.  Mix on medium speed for 8 minutes, until the dough is smooth and pulls away from the side.  

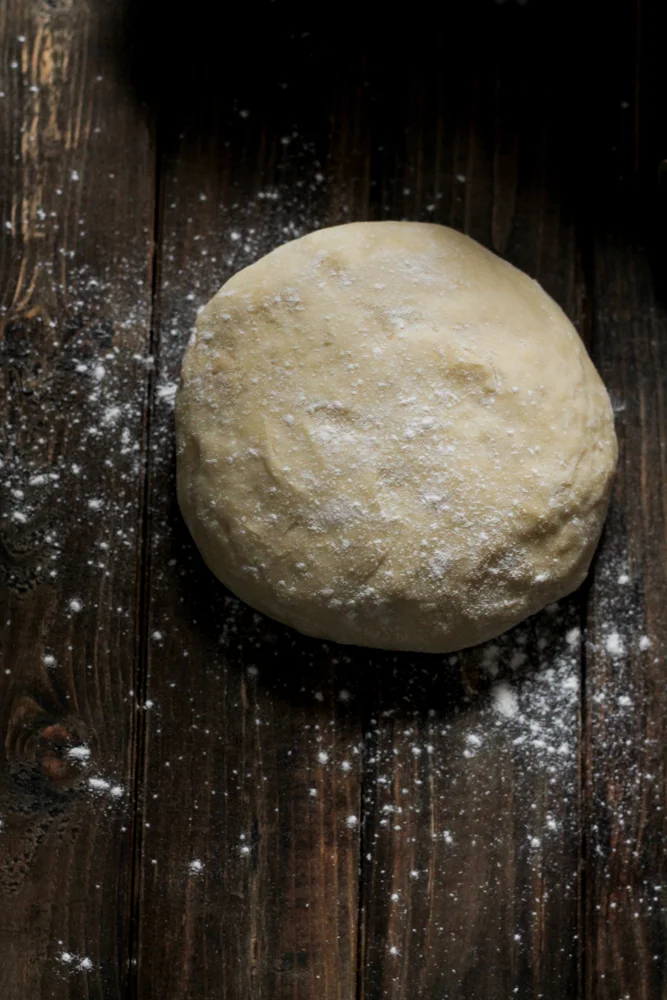
Turn the dough onto a floured surface and form a large, taught ball.  Place in an oiled bowl and cover loosely with plastic wrap.  Allow to rise in a warm place for 1 hour, or until doubled in size. 

While the dough is rising, combine sugar and cinnamon in a small bowl.  Grease a muffin tin with melted butter. 

After the dough has doubled in size, remove from bowl and roll out onto a floured surface into a 15x12 inch rectangle.  Brush with a thin layer of softened butter and sprinkle with cinnamon sugar and 2 tablespoons of chopped hazelnuts.  Pat the spices gently to press them into the dough.  

Preheat oven to 200 degrees.  

Roll the dough towards you, tucking so that the roll is tight.  Cut the roll into 9 equal slices.  Roll each roll into a 6-inch rope and twist.  Pinch the two ends of the twisted rope to form a nest.  Place each nest into a greased muffin cup and place a spoonful of Nutella into the centers.  Sprinkle with the remaining chopped hazelnuts.  Place the muffin tin in the oven and turn off the heat.  Leave the door half-way ajar.  Allow to dough to proof for 40 minutes.

Remove the muffin tin from the warm oven and set the oven to 400 degrees.  

Bake the puffs for 12 minutes, or until deep golden brown.  Allow to cool for 8-10 minutes before dusting with confectioner’s sugar and serving.  Enjoy! 


A Challenge to Self - Pierogies

How are you handling the February funk?  Something about this month always makes me want to hibernate.  To crawl under a blanket and alternate between napping, re-watching all the seasons of Downton Abbey, and eating anything warm, comforting, and (preferably) cheesy, that I can get my hands on.

A Challenge to Self - Pierogies {Pedantic Foodie}

Though it is often the last thing I feel like doing on these grey, the-weather-can’t-make-up-its-mind-again kind of days, it is important to keep myself busy.  Busy with projects, challenges, and new friends, because even though I want to flake on all of it SO BADLY, when I can muster up the courage to get some real work done, I always feel better.  Even if that work simply translates to finally tackling a new recipe you have been putting off for several years.

A Challenge to Self - Pierogies

Last year, I spent most of the winter weekends trying to nail down my favorite macaroni and cheese recipe.  With the help of my fiance and brother, we turophiles created what I believe is one of the very best macaroni and cheese renditions.  This year, I challenged myself to conquer all things dumplings, beginning with one of my favorite dumplings - the pierogi. 

I researched and schemed before attempting my very own pierogies, which, to my amazement, were far simpler than I had imagined.  In truth, I was rather embarrassed by the fact that I had allowed such a simple dumpling to intimidate me for so many years.  

A Challenge to Self - Pierogies {Pedantic Foodie}

In my research and testing process, I learned several things…  

1. Sour cream is important for a soft, delicate dumpling dough.  

2. Do not underfill the dumplings.  I was leery of over-stuffing my dumplings in the beginning, but the dough can handle a lot more filling than I gave it credit for, so be sure to get your pierogies plump with filling. 

3. Keep your dough moist.  This recipe makes about 21 pierogies, and filling and shaping them is definitely the most time-consuming portion of the process.  The dough will easily become sticky and crusty if it is not kept moist, so place the dough that is not yet being shaped on a very well-floured surface and cover with a damp paper towel until you are ready to use.  

4. Get your filling smooth.  Like, super smooth.  You’ll thank yourself in the end. 

A Challenge to Self - Pierogies {Pedantic Foodie}

We begin by making the dough.  It's a super-simple, non-yeasted dough that comes together with a wooden spoon and a good bit of kneading.

A Challenge to Self - Pierogies {Pedantic Foodie}

While the dough rests, potatoes are peeled and boiled in super salty water because you would never, ever, ever consider boiling potatoes without salting the water, right?  Of course you wouldn’t.  

A Challenge to Self - Pierogies {Pedantic Foodie}

Once the potatoes are fork-tender, they are smashed with butter, sour cream, milk, and a whole lot of gruyere.  

Then, the potatoes are put through a fine mesh sieve to make them extra smooth and creamy.  If mousse and mashed potatoes had a child, it would be this filling.  Try very hard not to eat it all before you fill the pierogies. 

A Challenge to Self - Pierogies {Pedantic Foodie}

Once the dough has rested, it is rolled and shaped into circles.  

A heavy spoonful of filling is placed in the center of each circle of dough, and then the dough is folded over and the edges are pinched to form the dumpling. 

A Challenge to Self - Pierogies {Pedantic Foodie}

These dumplings go directly into a pot of simmering, salted water to cook for 8 minutes.  

A Challenge to Self - Pierogies {Pedantic Foodie}

While the dumplings are simmering, heat several tablespoons of butter in a frying pan.  The cooked pierogies go directly into the hot butter to fry until the edges are golden brown and crispy.  

A Challenge to Self - Pierogies {Pedantic Foodie}

I’m unreasonably excited about these dumplings.  Carbs filled with carbs = happy lady. 

A Challenge to Self - Pierogies {Pedantic Foodie}

Oh, bikini season is coming?  Get outta here with that negativity. 

A Challenge to Self - Pierogies {Pedantic Foodie}

Fight the funk and make pierogies.  

Sincerely, 

Pedantic Foodie


Potato & Gruyere Pierogies 

makes 21 / recipe adapted slightly from Emeril

for the dough

- 2 1/4 cups all-purpose flour + 1/4 cup for dusting 

- 1/2 teaspoon kosher salt

- 1/2 cup water 

- 1 egg 

- 2 tablespoons olive oil 

- 2 tablespoons sour cream

Combine salt and flour in a large bowl; set aside. 

In a large measuring cup, whisk to combine water, egg, oil, and sour cream.  Pour the wet ingredients into the dry ingredients and use a wooden spoon to stir.  Mix until a rough dough has formed and then transfer to a well-floured surface.  Knead for 3-5 minutes, until the dough is smooth and elastic.  Shape the dough into a ball and dust lightly with flour.  

Cover the dough with a damp paper towel and allow to rest for 30 minutes.  While the dough is resting, prepare the filling. 

for the filling

- 4 medium yukon gold potatoes, peeled and cut into cubes 

- 3 tablespoons unsalted butter 

- 1/2 teaspoons kosher salt 

- freshly ground pepper

- 6 tablespoons whole milk, at room temperature 

- 1 1/2 cups shredded gruyere

Fill a medium saucepan with water, seasoned with a palmful of kosher salt.  Add potatoes and place over high heat.  Bring to a boil.

Boil for 15-20 minutes, until fork tender.  

Drain away the water and add butter, salt, and pepper.  Mash roughly with a potato masher before adding milk and gruyere.  

Stir until the cheese had melted and the potatoes are fairly smooth.

Press the potatoes through a fine mess sieve to create a smooth, potato puree.  

assembly & frying

-  1/4 cup unsalted butter

Shape the dough into a rectangle - 6 inches long, by 5 inches wide.  Cut the rectangle into three strips, about 1.75 inches wide.  Then, cut each strip into 7 equal pieces, leaving you with 21 small squares of dough.  Roll each piece into a small ball. 

Place the dough on a very well-floured surface and keep covered with a damp paper towel until ready to use.  

Flatten each ball with the palms of your hands and stretch to form a 3-inch circle.  Place about 1 1/2 tablespoons of the potato filling in the center of each round of dough.  Fold the dough over on itself to form the dumplings, pinching to seal the edges.  Place the finished dumplings on a baking sheet lined with parchment and cover with damp towel until all the dumplings are shaped. 

Fill a large pot with water and salt liberally.  Bring to a simmer over medium heat.  

Working in several batches, drop dumplings into the simmering water and cook for 8 minutes.  

Use a slotted spoon to remove the cooked dumplings from the pot and set aside.  At this point, the dumplings can be refrigerated until ready to use.  

To serve:  Place one tablespoon of butter in a medium frying pan and melt over medium heat.  When the butter begins to bubble, add several of your cooked pierogies to the pan and cook for 3-4 minutes on each side; until they are golden brown and the edges are crisp.  

Serve immediately.  Enjoy!


You may also like...