
![These easy sirloin steak wraps are stuffed with pickled peppers and roasted garlic whipped feta. The perfect summer meal! [ www.pedanticfoodie.com ]](https://images.squarespace-cdn.com/content/v1/5150ff2ae4b07a397217c428/1531171412152-RTTD29QU3IJ50V9LK8FB/These+easy+sirloin+steak+wraps+are+stuffed+with+pickled+peppers+and+roasted+garlic+whipped+feta.++The+perfect+summer+meal%21+%5B+www.pedanticfoodie.com+%5D)
Let's make Tuesday night dinner together: summer style.
Read more[ Easter Brunch pt. 2. ] Agua Fresca from Over Easy
At this point (many Easters ago) my siblings and I would have begged my mother to her breaking point and gone into full egg-stuffing mode.

We used to have quite the grandiose egg hunts on my family's humble two acres, and once the eggs were pulled out of the barn loft and the candy bought, we would not stop pestering my mother for the task of stuffing them. We would take solemn vows against eating the candy while stuffing, but our thrill in the job was by no means dimmed. My sister and I grabbed our favorite colors - hers purple and mine chartreuse - leaving the unwanted eggs for our compliant younger brother.

I took pride in matching the candy to the eggs and we would excitedly make "bonus eggs" that contained just shy of the number of jelly beans that would keep the egg from closing.

Easter was always joyous, but not because of the new dresses, or the thrilling hunts, or my grandmother's succulent, glazed hams, but because our parents never let us forget that those traditions were just that - traditions, and we were going to church that morning to celebrate something far greater.

Earlier this week, I shared the recipe for this quiche and suggested it as a possible Easter morning option.

Today, on this very fine Wednesday, I am giving you the perfect spring drink to serve alongside it!

Up until last week, I had never made any form of agua fresca before, but when I saw the ridiculously simple ingredient list, I decided I had no excuse.

So, what is agua fresca? Well it is a little more than its translation would suggest. I mean, that would be a little boring.

Agua frescas are water-based, non-alcoholic drinks that have been flavored with fruits and/or herbs and sweetened lightly.

I have a very strong sense that you will be seeing quite a few of them this year so you may want to find your blender. Now that I know the simplicity there is nothing stopping me from spiking every glass of water with some herbaceous fusion.

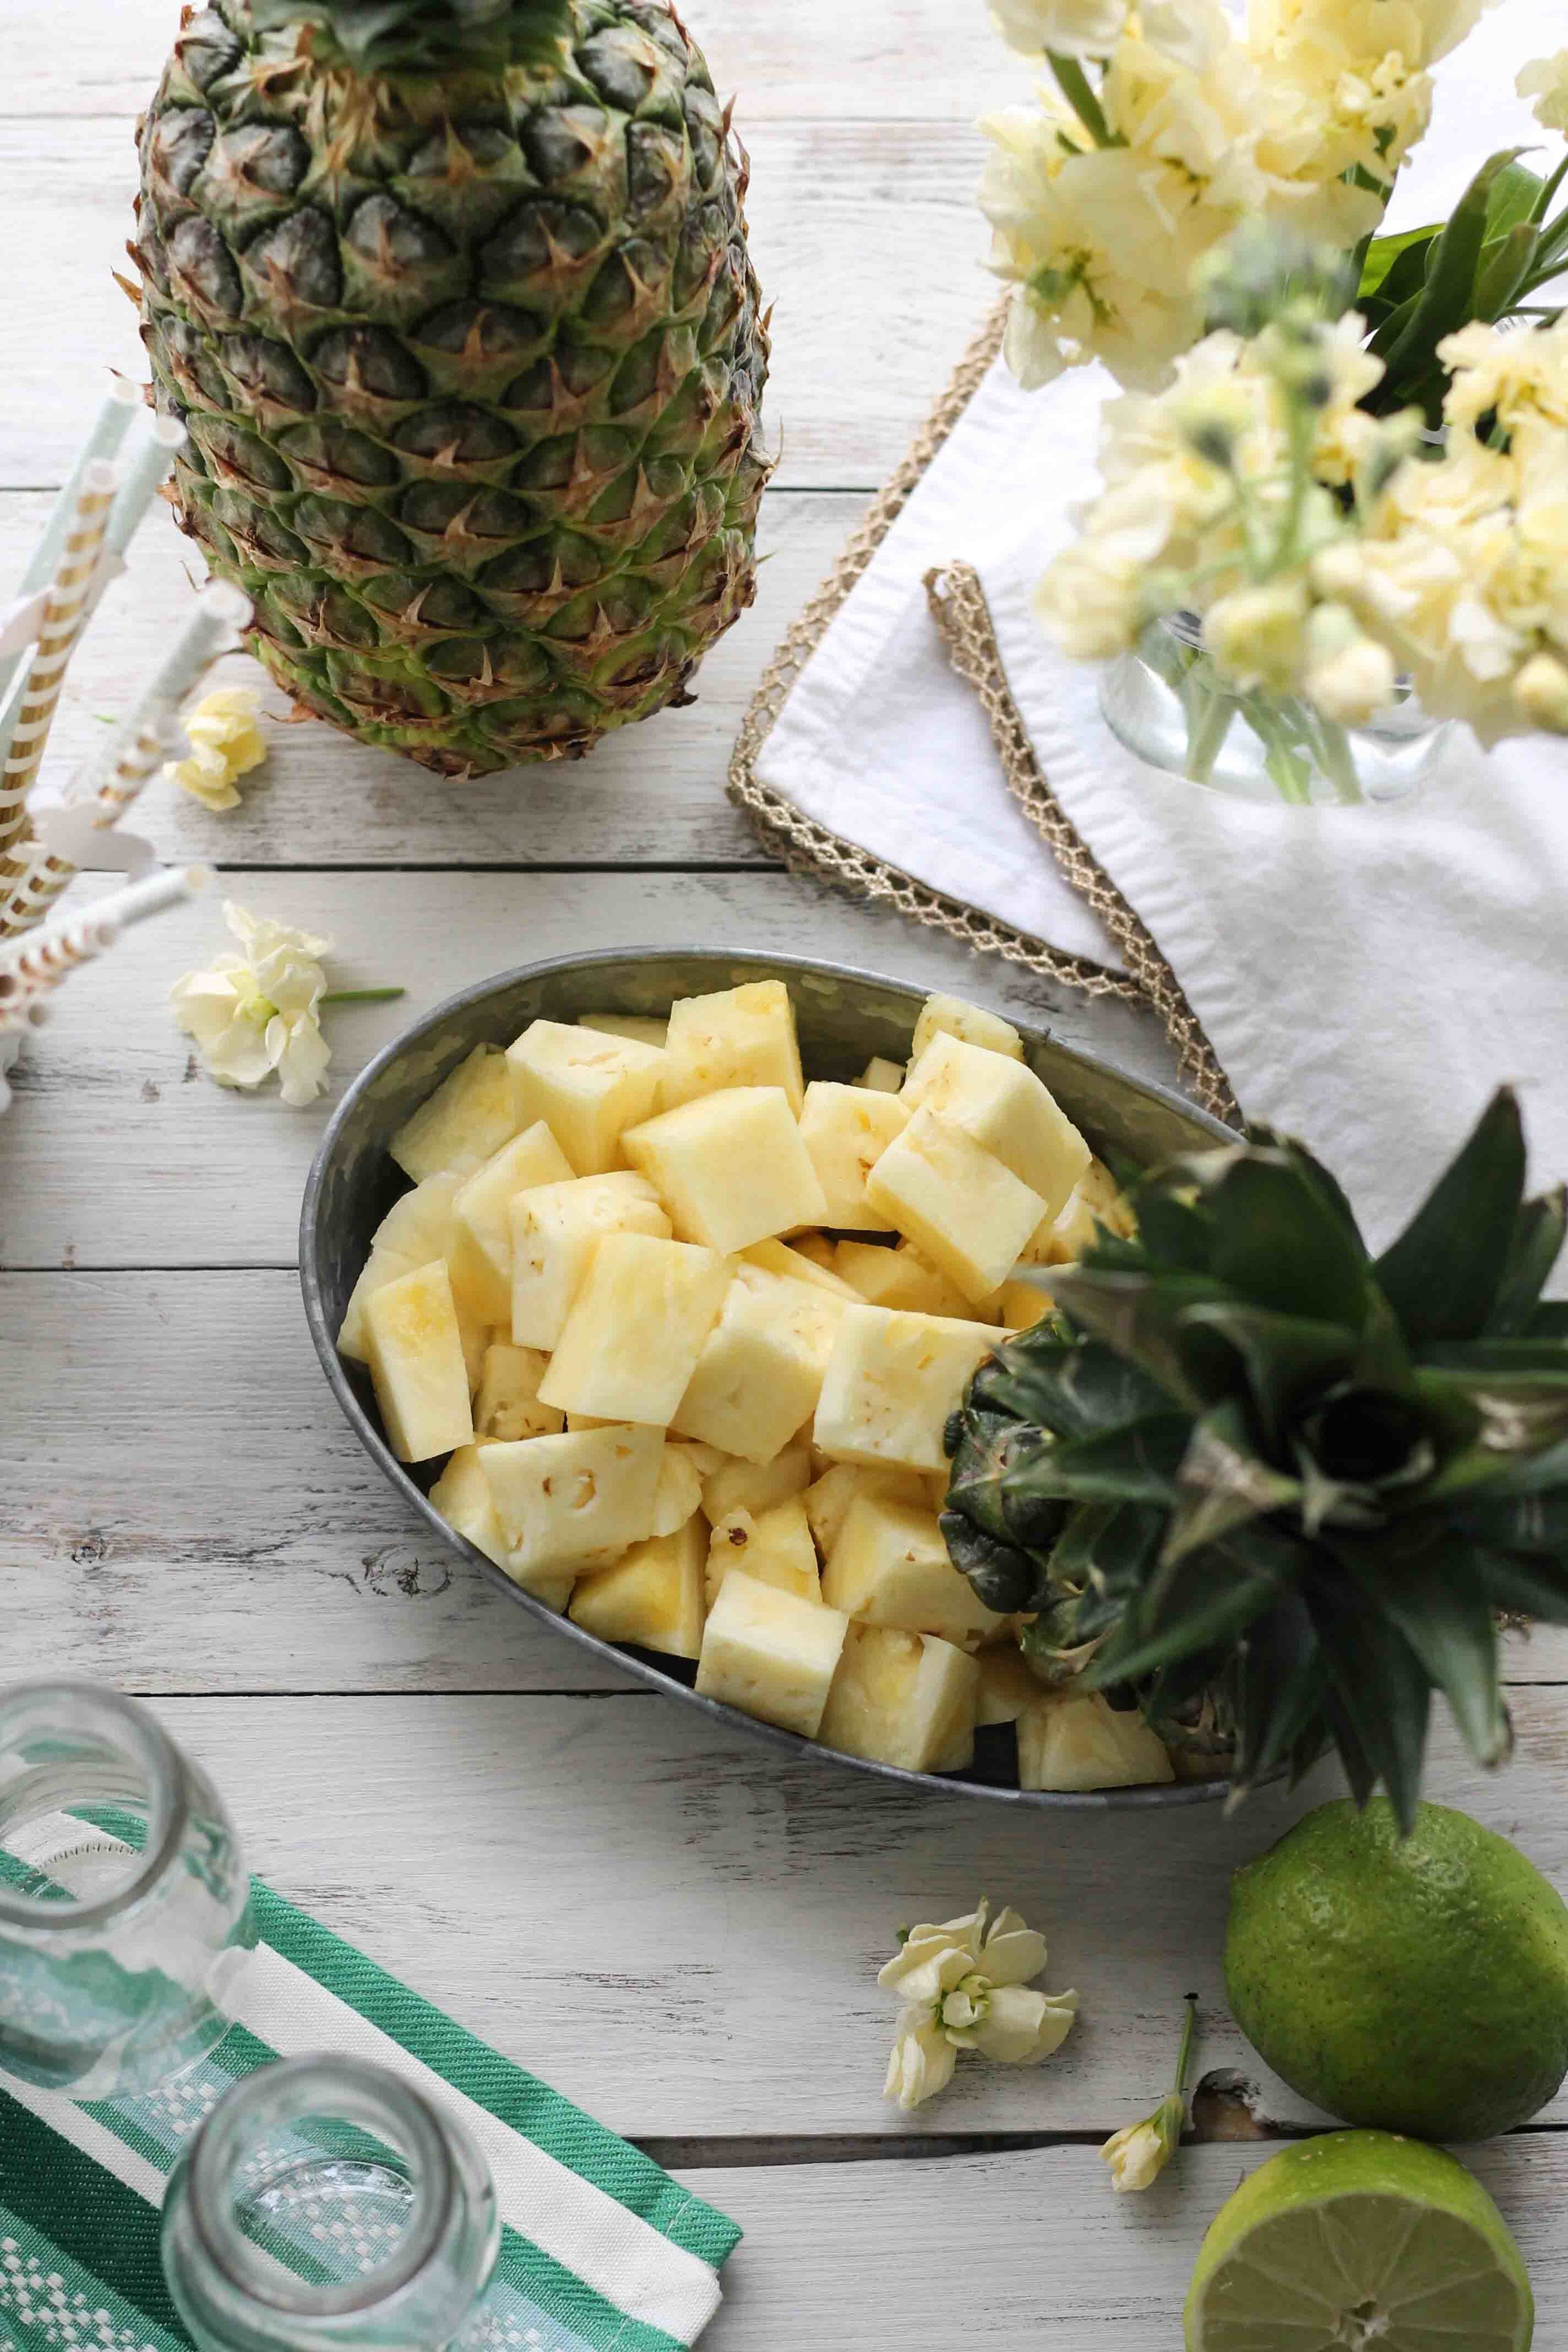
This particular recipe called for cucumbers, pineapple, and mint. I added a dose of fresh lime for a bit more acidity.

I have recently realized that I prefer drinking cucumbers over eating them. Their flavor is so refreshing.
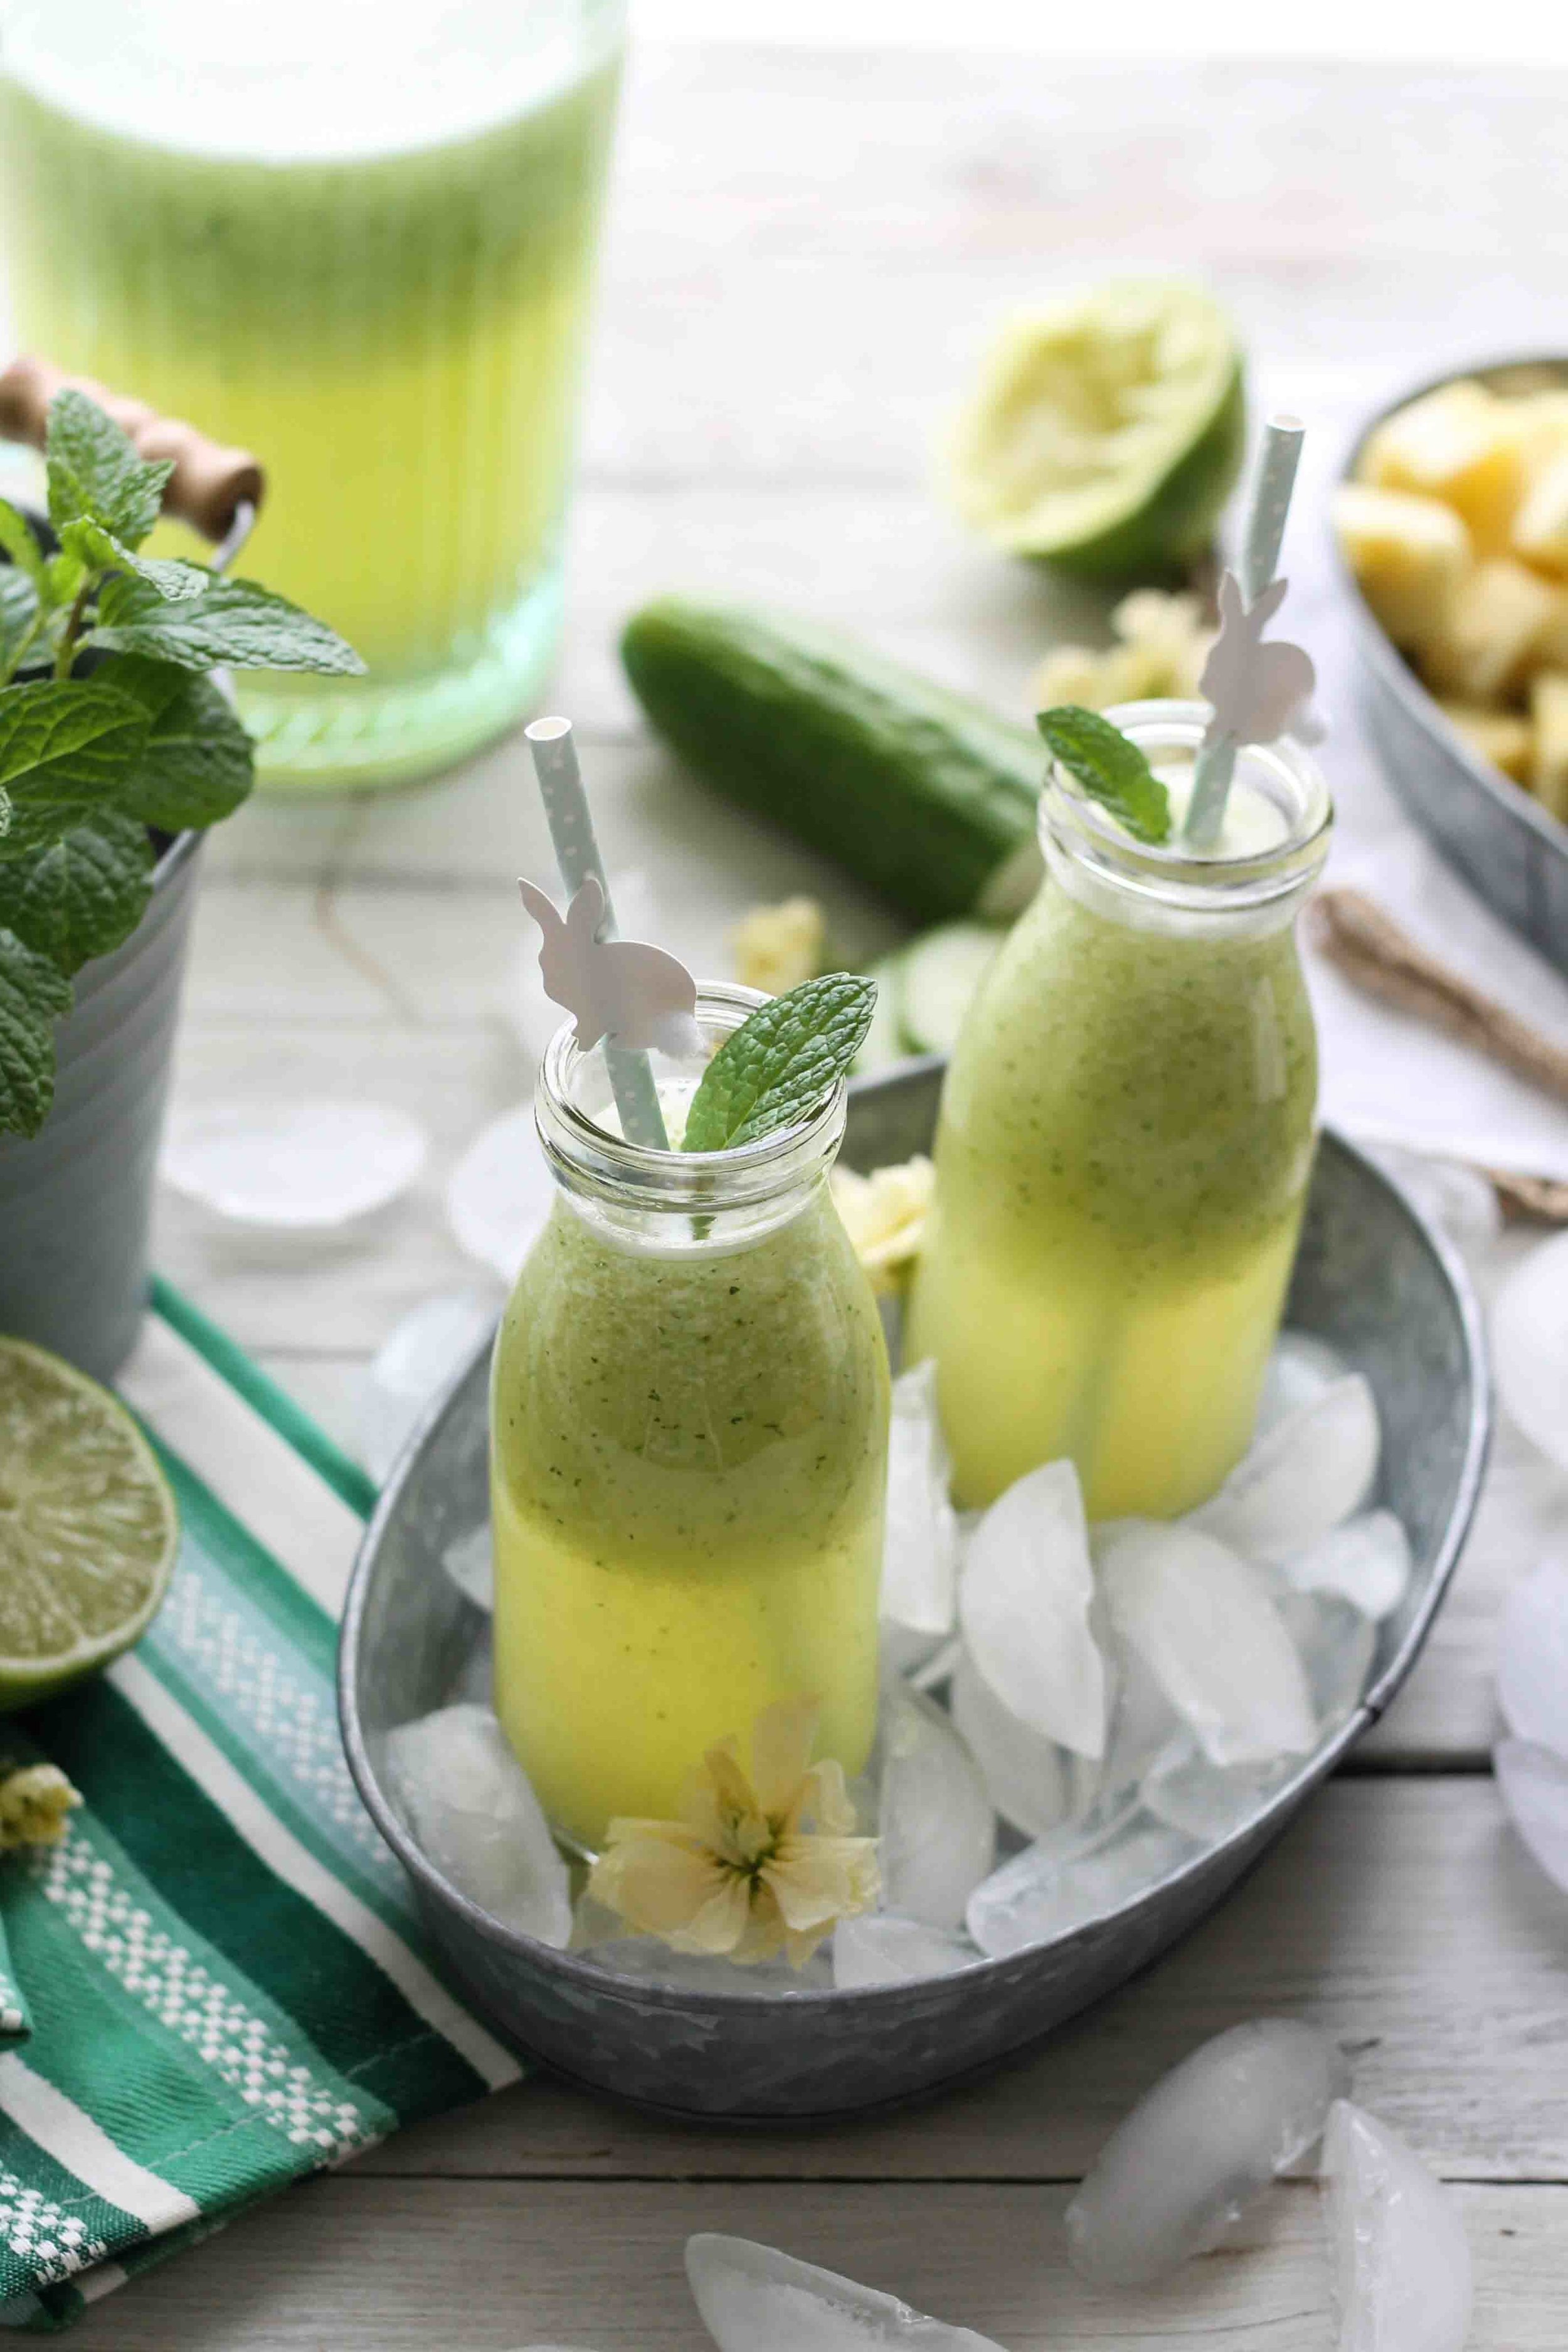
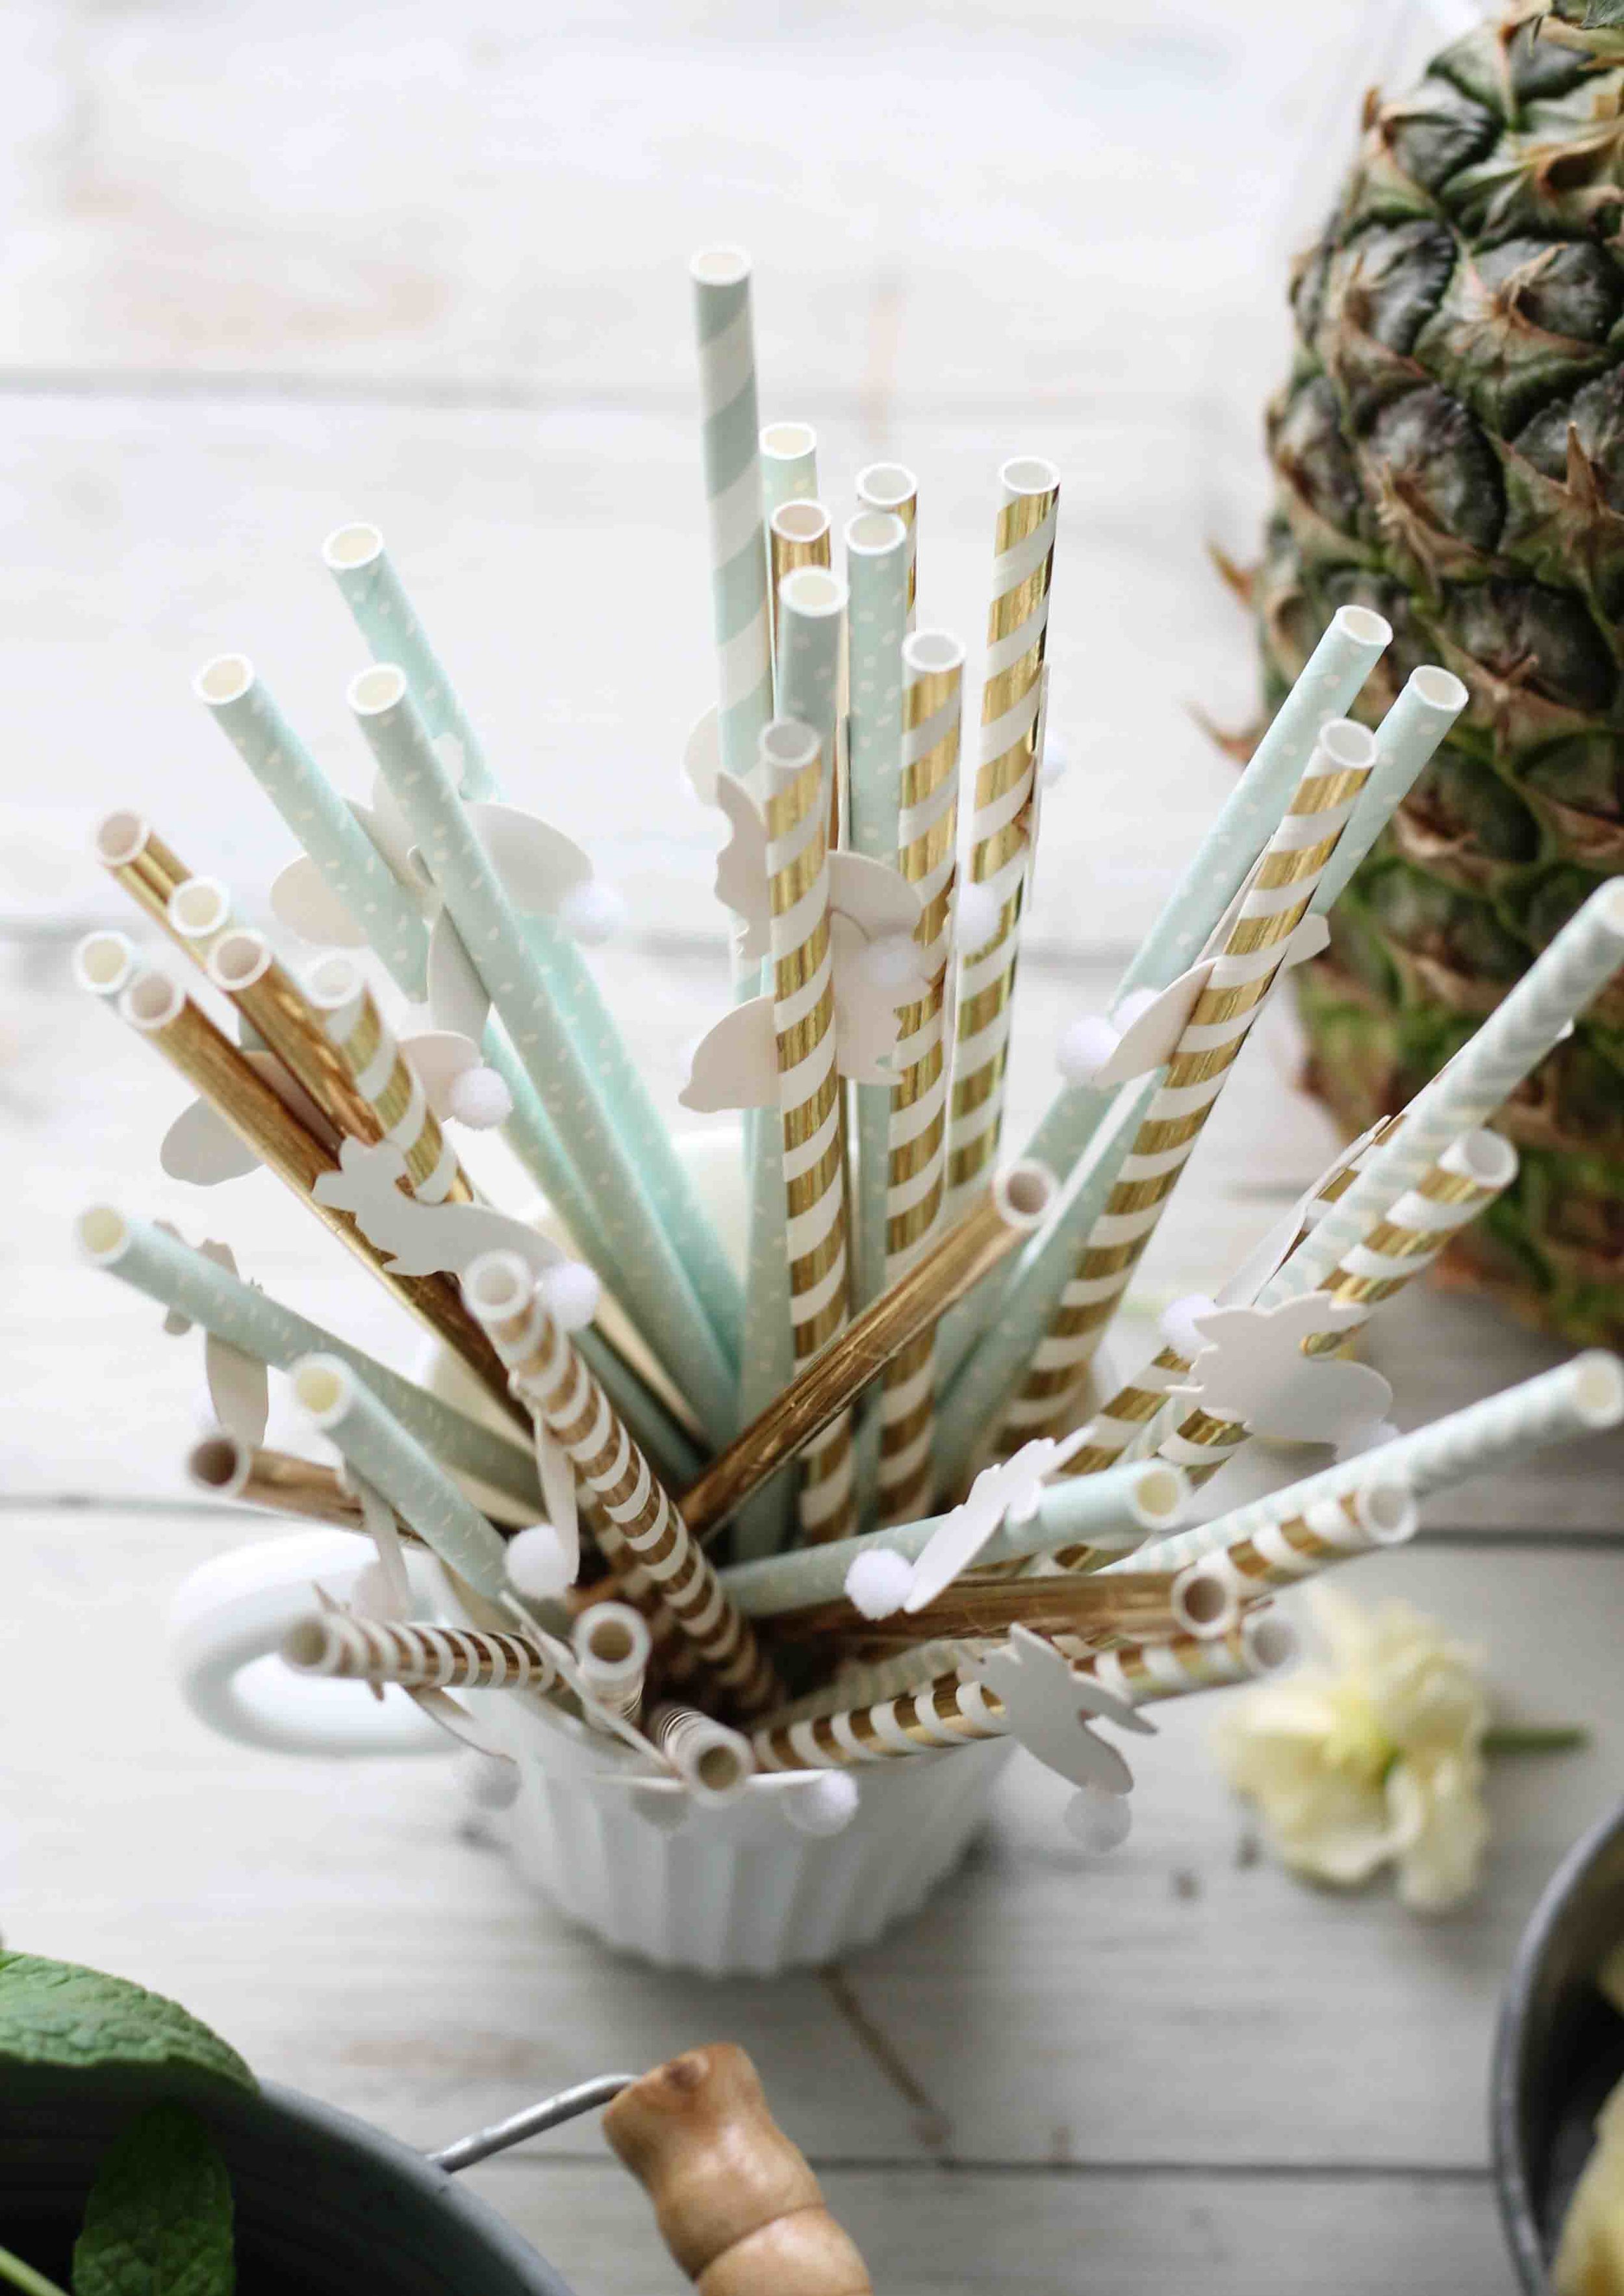
Let's pause to acknowledge the world's most adorable paper straws. The pom-pom tails make my heart skip a beat. I'm squealing as I type this.

This lovely spring tonic can be made the night before you plan to serve it and refrigerated. The flavors will actually improve and meld as it sits.
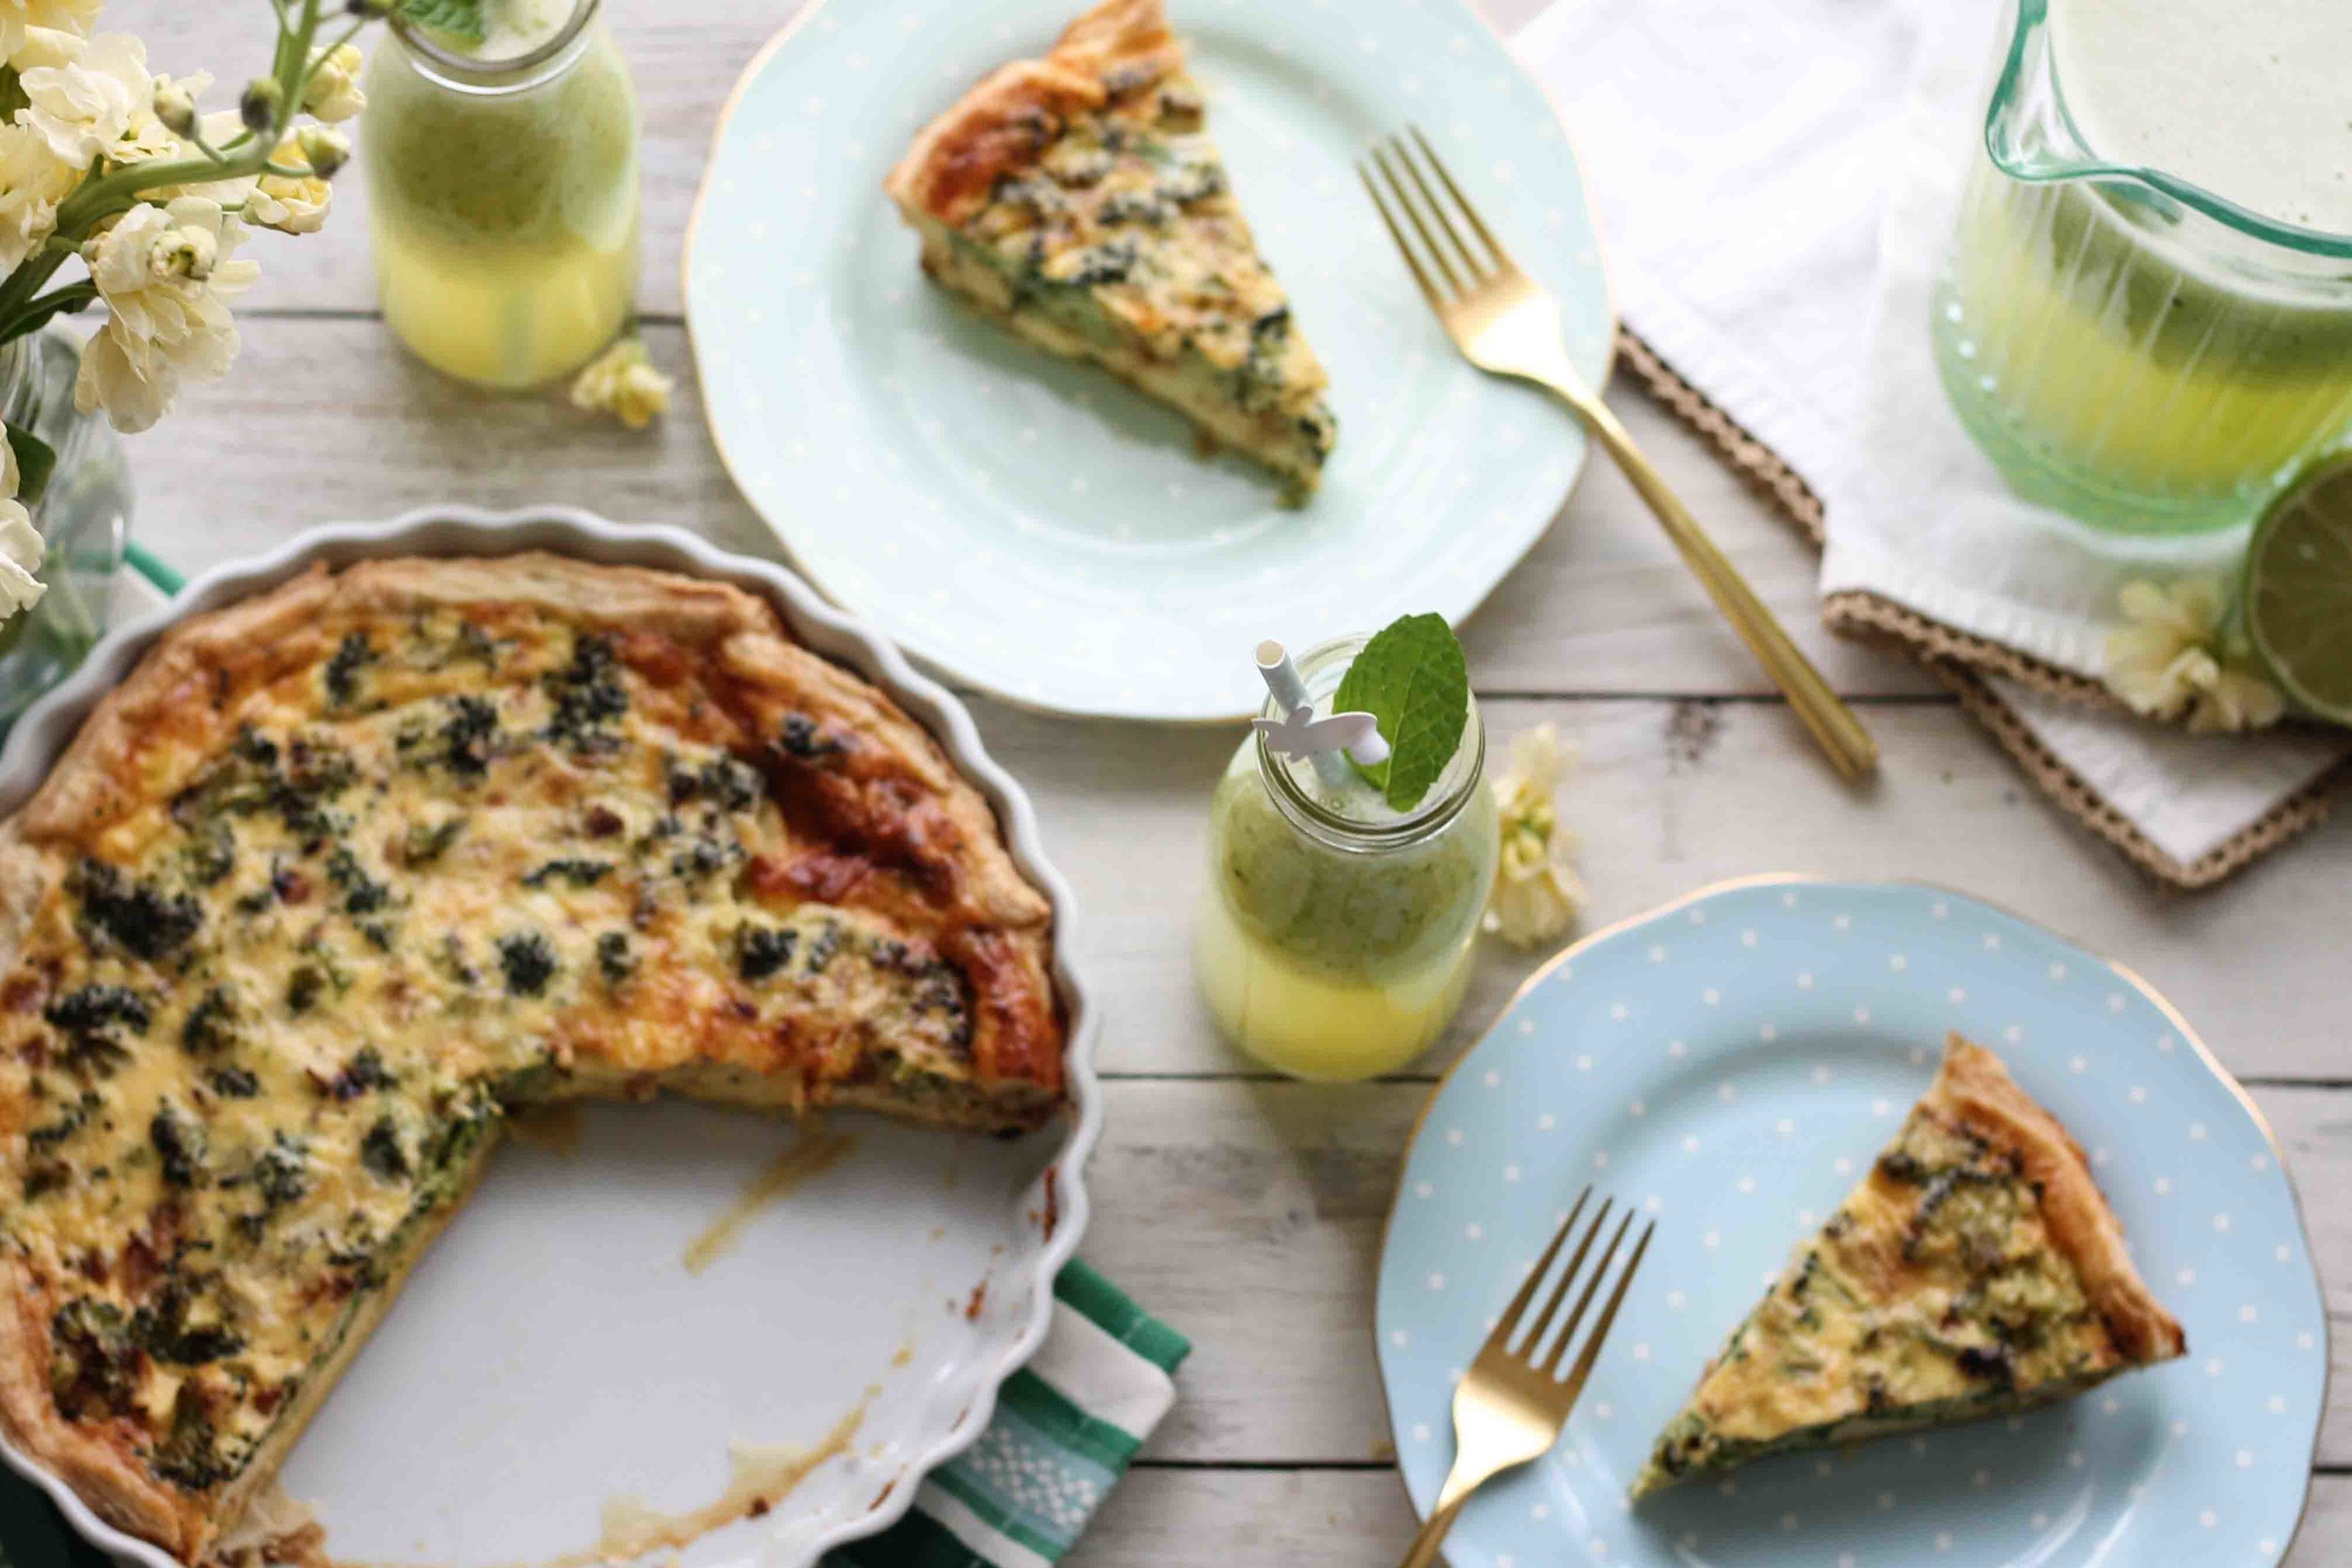
Simple, fruity, and perfectly refreshing. This is the ideal pairing for your hearty breakfast quiche, and a great way to pave the way for all those cadbury eggs.
Sincerely,
Pedantic Foodie
Cucumber Pineapple Agua Fresca
serves 8 / recipe from Over Easy (slightly adapted)
- 3 cups fresh pineapple cubes
- 1/2 english cucumber, sliced
- 10 fresh mint leaves
- 1/4 cup fresh lime juice
- 1/2 cup granulated sugar
- 5 cups filtered water
In the base of your blender combine pineapple, cucumber, mint, lime, sugar, and 2 cups of the water. Blend on high until very smooth. The mixture will be quite thick.
Transfer to a large pitcher and stir in the remaining water. Cover and refrigerate for at least 2 hours. This will give the flavors a chance to bloom and meld.
Give the agua fresca a good stir before dispensing. Serve over ice with cute straws and maybe a sprig of mint if you're feeling it. Enjoy!
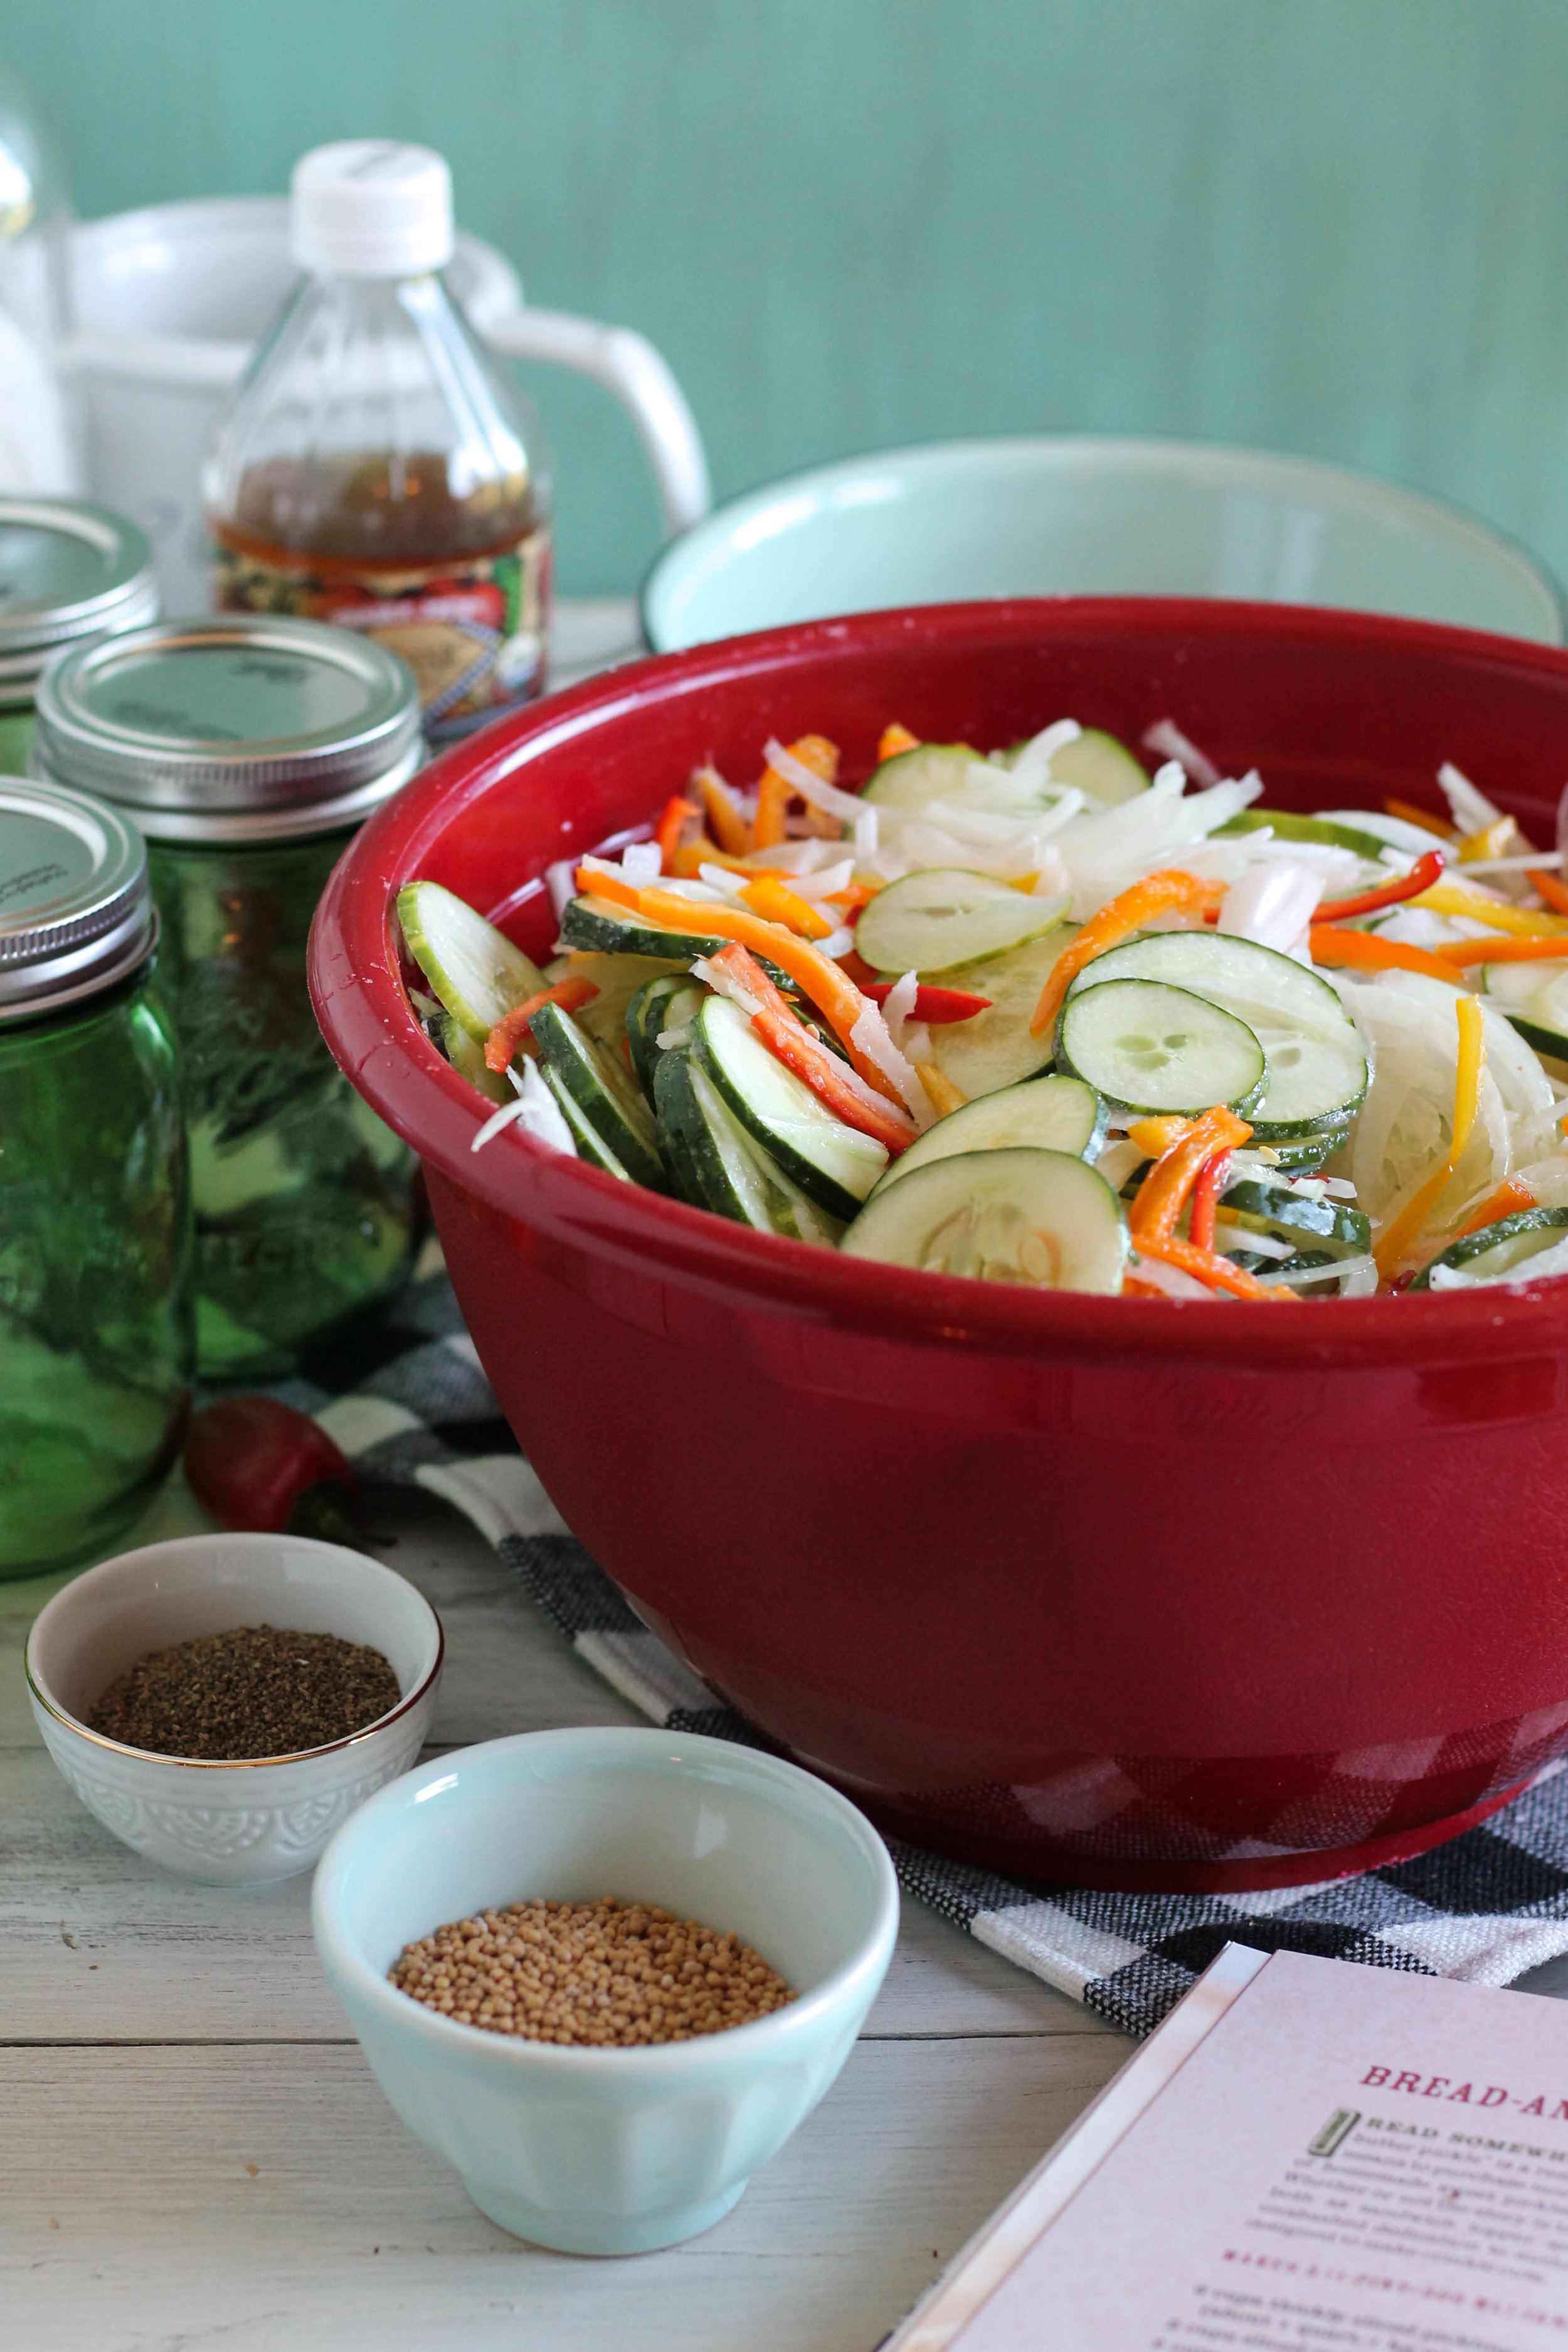
My Favorite Bread & Butter Pickles from Food in Jars
My family moved to the house they live in now when I was ten. On one action-packed day in May we went from a small house with a backyard that was parallel to a major road in bustling suburbia, to a home with no streetlights in sight and a yard that seemed to go on for ages, at least in the eyes of a ten-year-old.

The following summer we planted a garden, with no comprehension of just how prolific cucumber plants could be. When we reached the point of having one-hundred cucumbers in our refrigerator at one time, my mother decided that it was time for intervention. My grandmother came up to rescue us and our over plentiful garden, and that day I sliced cucumbers for what felt like forever. Together, we three ladies made jar after jar of sweet, bread and butter pickles.
Since that warm, summer afternoon, I have loved bread and butter pickles piled high on hot dogs - my personal favorite, or stacked atop sandwiches. Their flavors are so familiar and comforting.
My fiancé brought me a dozen cucumbers several weeks ago and I knew exactly what I wanted to do with them.

I had made Marisa's bread and butter pickles two summer’s ago and they were without a doubt the very best I had ever tasted. Sadly, they did not last as long as I had hoped, so this year I made a double batch.

If you are going to attempt pickle-making, which you definitely should, you are going to want a mandoline slicer. Unless of course you would like to slice twelve cucumbers by hand…but I would not recommend it.

Just be very careful using the mandoline. My mom lost a finger tip once… Everyone at church the next day thought she destroyed her finger playing an instrument. Why do they call them mandolines anyways? Her children (including myself) still wonder if it was all a devious ploy to escape dishes for several weeks.

But back to the pickles! The pickling process begins with salt. A lot of salt.
The cucumbers, onions, and peppers are sprinkled generously with pickling salt and then allowed to sit in the refrigerator overnight. The salt will draw much of the water out of the vegetables to make room for the delicious brine that we are going to soak them in.

The pickling liquid is made with a combination of apple cider vinegar, sugar, mustard seed, celery seed, red pepper flakes, and ground cloves.
Now here is when you have to have your grandmother on standby and your fingers ready to be burnt, because that’s just part of the process.

Place all your jars in a large pot and cover with water. The jars need to be sterilized before we can fill them with our pretty pickles.
The lids and rings will need to simmer in a smaller pot. The key is to keep everything hot in order to avoid any icky bacteria from creeping into our sterilized jars.

As soon as the pickles have finished steeping in the brine, you can fill the jars. You’ll need a wide-mouthed funnel, a pair of jar tongs, and some paper towels for this process. It sounds scary and complicated, but the more you do it, the easier and less intimidating it gets. Believe me.

I still have to mentally prepare myself for a day of canning, but it’s so worth it.

We might have just begun our diy Christmas gifts!
Sincerely,
Pedantic Foodie
My Favorite Bread and Butter Pickles
makes six 1-pint jars / recipe adapted from Food in Jars
- 12 cups cucumbers in 1/8-inch slices (pickling cucumbers are best, if you can find them)
- 4 cups sliced sweet peppers (I like the mini peppers but bell peppers work great too)
- 4 cups sliced sweet onion (about 2 large onions)
- 1/2 cup pickling salt
- 4 cups apple cider vinegar
- 3 cups granulated sugar
- 1/4 cup mustard seed
- 4 teaspoons celery seed
- 2 teaspoons red pepper flakes
- 1 teaspoon ground cloves
Slice cucumbers, using a sharp mandoline and combine with sliced peppers, onions. Sprinkle with pickling sauce and toss to coat. Cover with plastic wrap and refrigerate for four hours, or overnight. This will draw much of the water out of the cucumbers so that they can soak up all of the delicious pickling liquid later on!
Rinse and drain the vegetables thoroughly, then prepare the brine.
Place your jars in a very large pot and cover with water. Bring to a boil and allow to boil until you have finished the pickles. Place the lids and rings in a small saucepan of water and simmer over low heat.
Prepare the pickling liquid by combining the vinegar and sugar in a large pot. Place over medium heat and stir until the liquid has heated through and all the sugar has dissolved. Add spices and increase the heat to bring the mixture to a boil.
Add the drained vegetables to the boiling brine and stir to combine. Cook for 5-10 minutes, until all the vegetables are fully heated through and have begun to soften.
Line your countertop with a heavy dish towel. Remove the jars from the boiling water (jar tongs are very helpful for this), one at a time and fit with a wide-mouthed funnel. Use tongs to fill the jars with the pickles. Ladle in the brine until the jar has only 1/2-inch of headspace. Gently tap the jars on the towel to remove any air pockets. Dip a paper towel into the boiling water and carefully clean the edges of the jar before fitting with the lids and rings. Repeat with each jar until all the jars are filled. Then, return to the pot of boiling water and boil for ten minutes. Remove from water and return to the dish towel to cure for at least two days before opening and enjoying. The pickles will get better and better the longer they sit.
Enjoy, and be proud, you just made your own pickles!
you may also like...


![[ BABY GIRL SWAN NURSERY ] A sweet, swan-themed haven for our baby girl! www.pedanticfoodie.com](https://images.squarespace-cdn.com/content/v1/5150ff2ae4b07a397217c428/1587566499633-N0CMF4397EFX6OKC8FQE/%5B+BABY+GIRL+SWAN+NURSERY+%5D+A+sweet%2C+swan-themed+haven+for+our+baby+girl%21+www.pedanticfoodie.com)


![Lemon+Coconut+Muffins+with+Coconut+Streusel+[www.pedanticfoodie.com].jpeg](https://images.squarespace-cdn.com/content/v1/5150ff2ae4b07a397217c428/1578498374877-G6AYLOEP3UCFFOIXEJI0/Lemon%2BCoconut%2BMuffins%2Bwith%2BCoconut%2BStreusel%2B%5Bwww.pedanticfoodie.com%5D.jpeg)

I love that my generation has taken a hold of snacks and made them into not only a socially-acceptable mode of daily nutrition but a hallowed one. If you're not entirely sure of the current snack pseudonyms, see; charcuterie, tapas, tastings, flights…